How to customize the array?
Dec 9, 2025
overview
The array supports a wide range of customization options. You can adapt it to your workspace in four main ways.


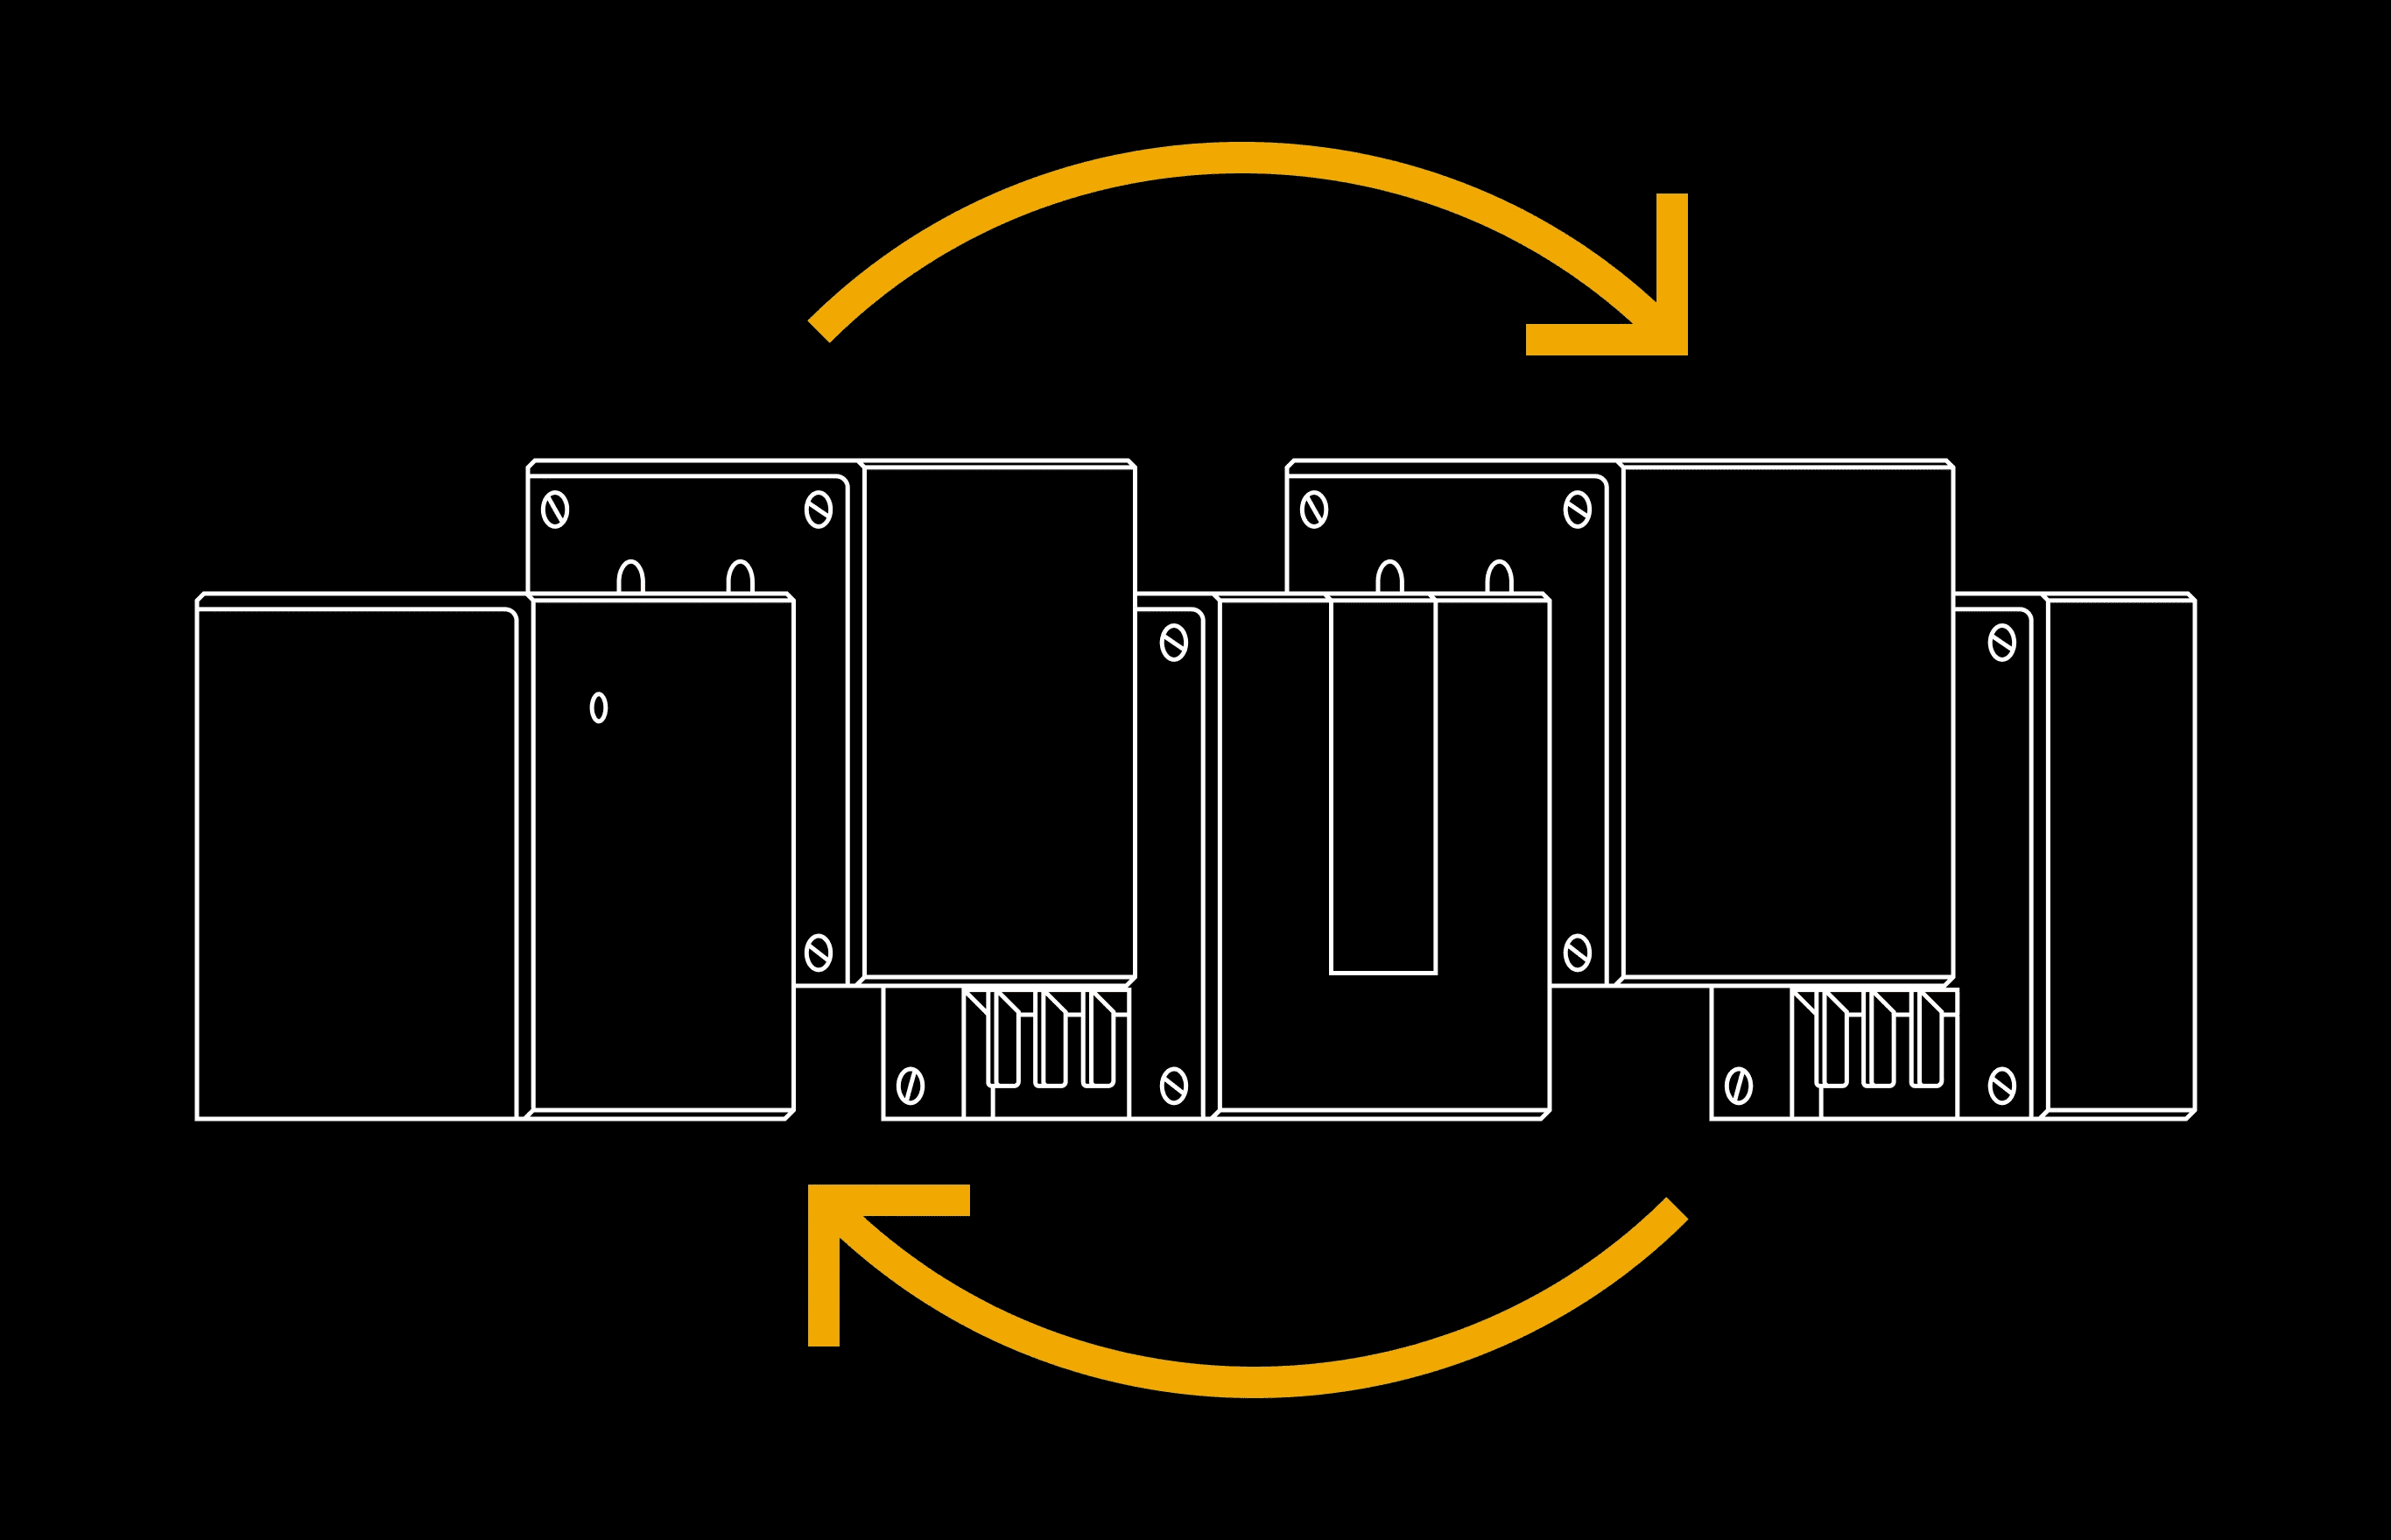
module assembly
Choose the modules you need and place them in any order that best fits your desk and your workflow. You can start with a compact layout and extend it with more modules as your setup grows.
Refer to How to design your array? for more information.
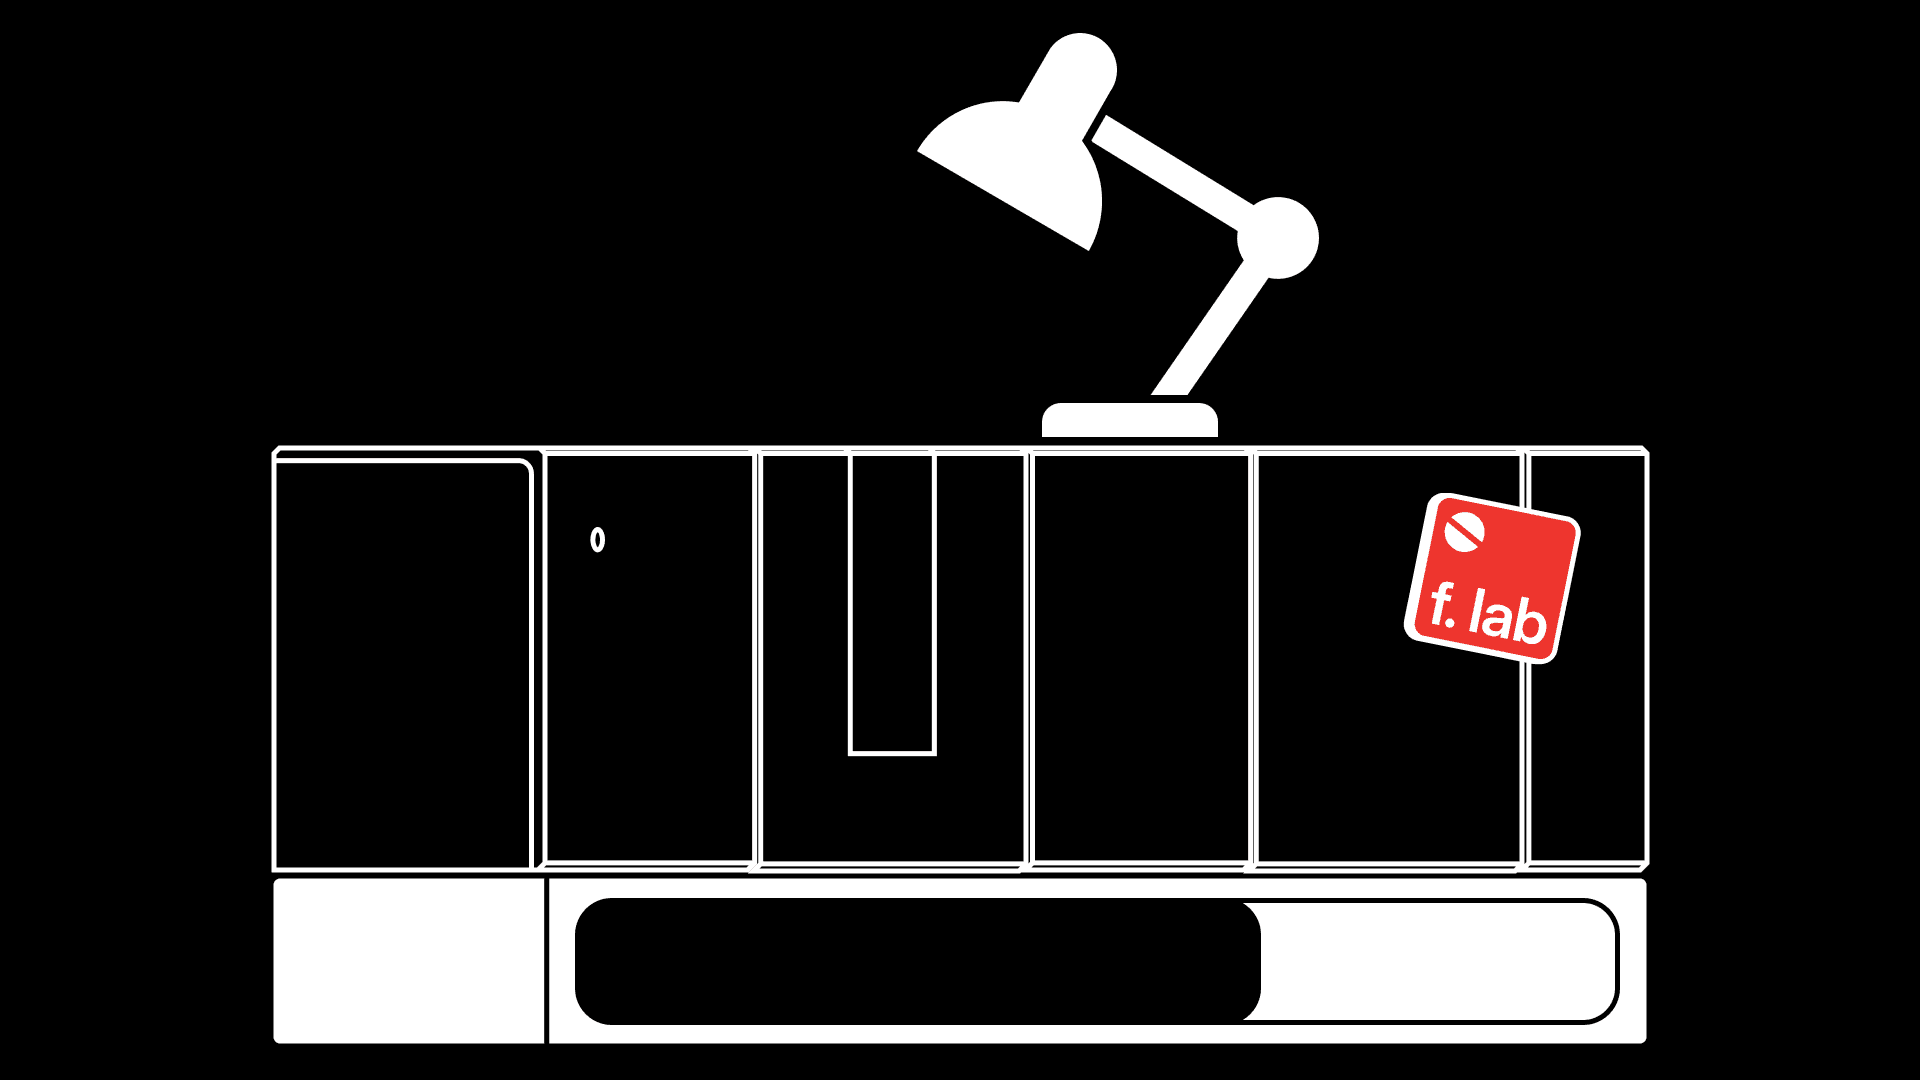
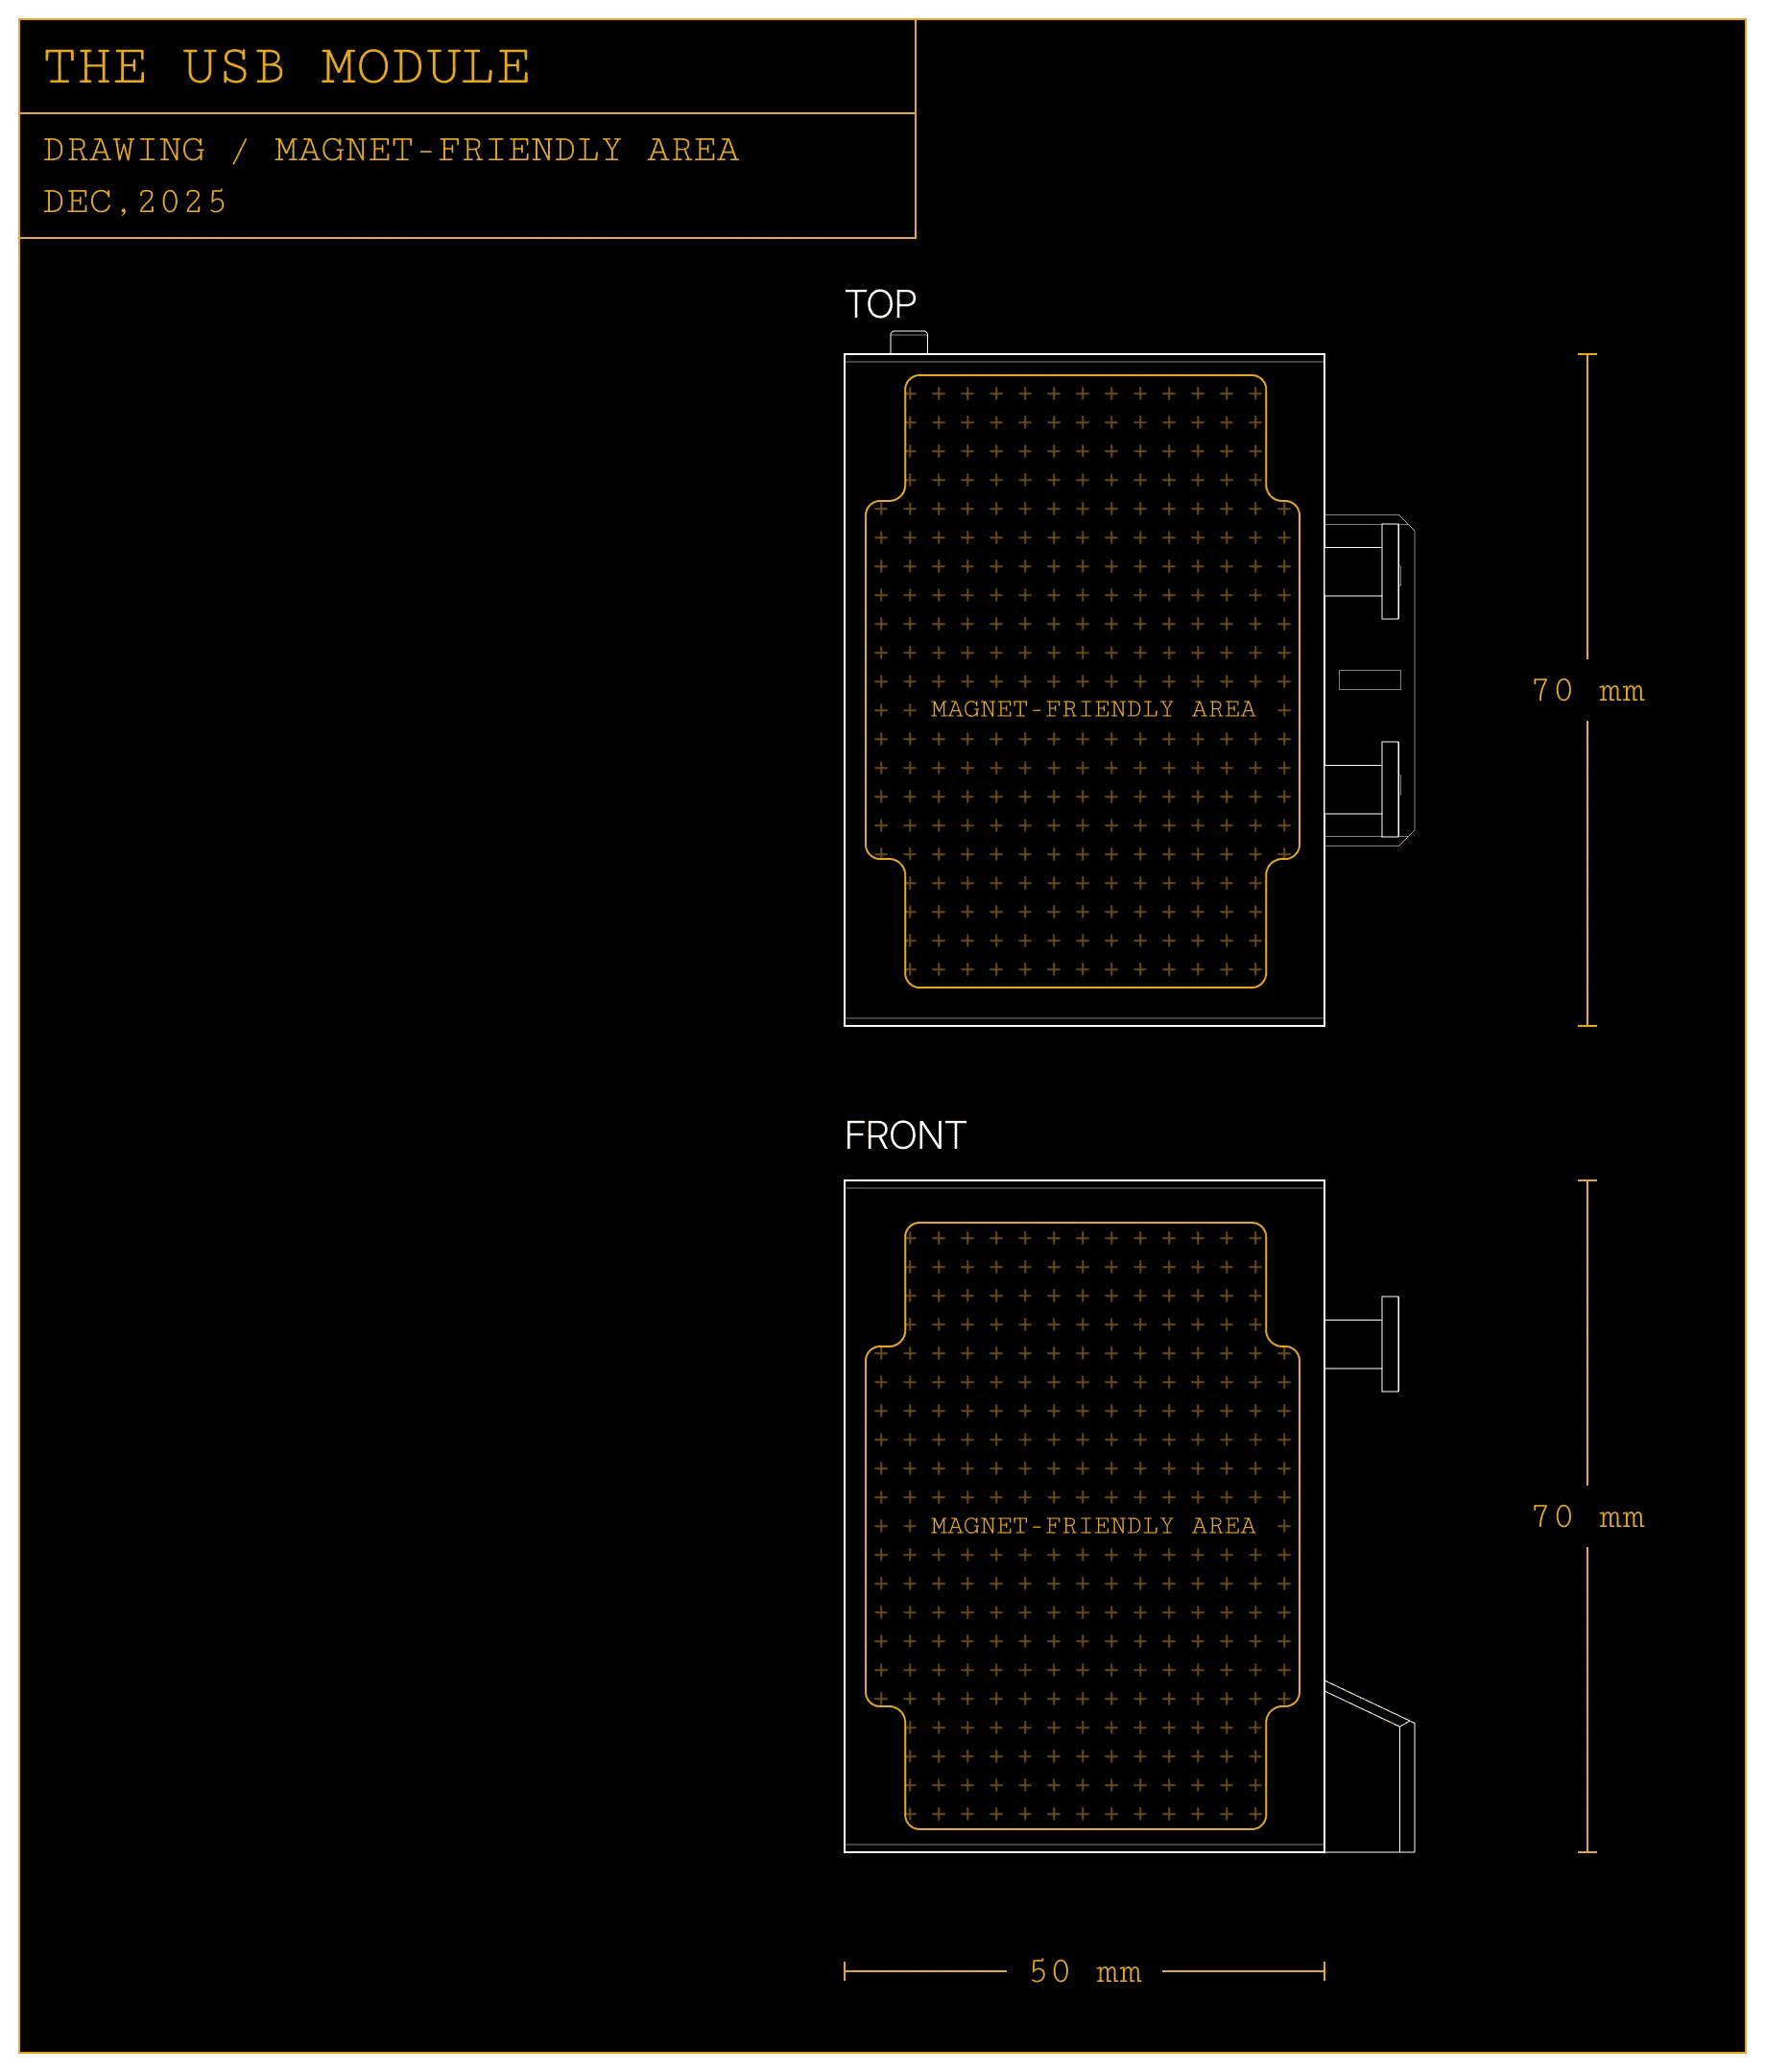
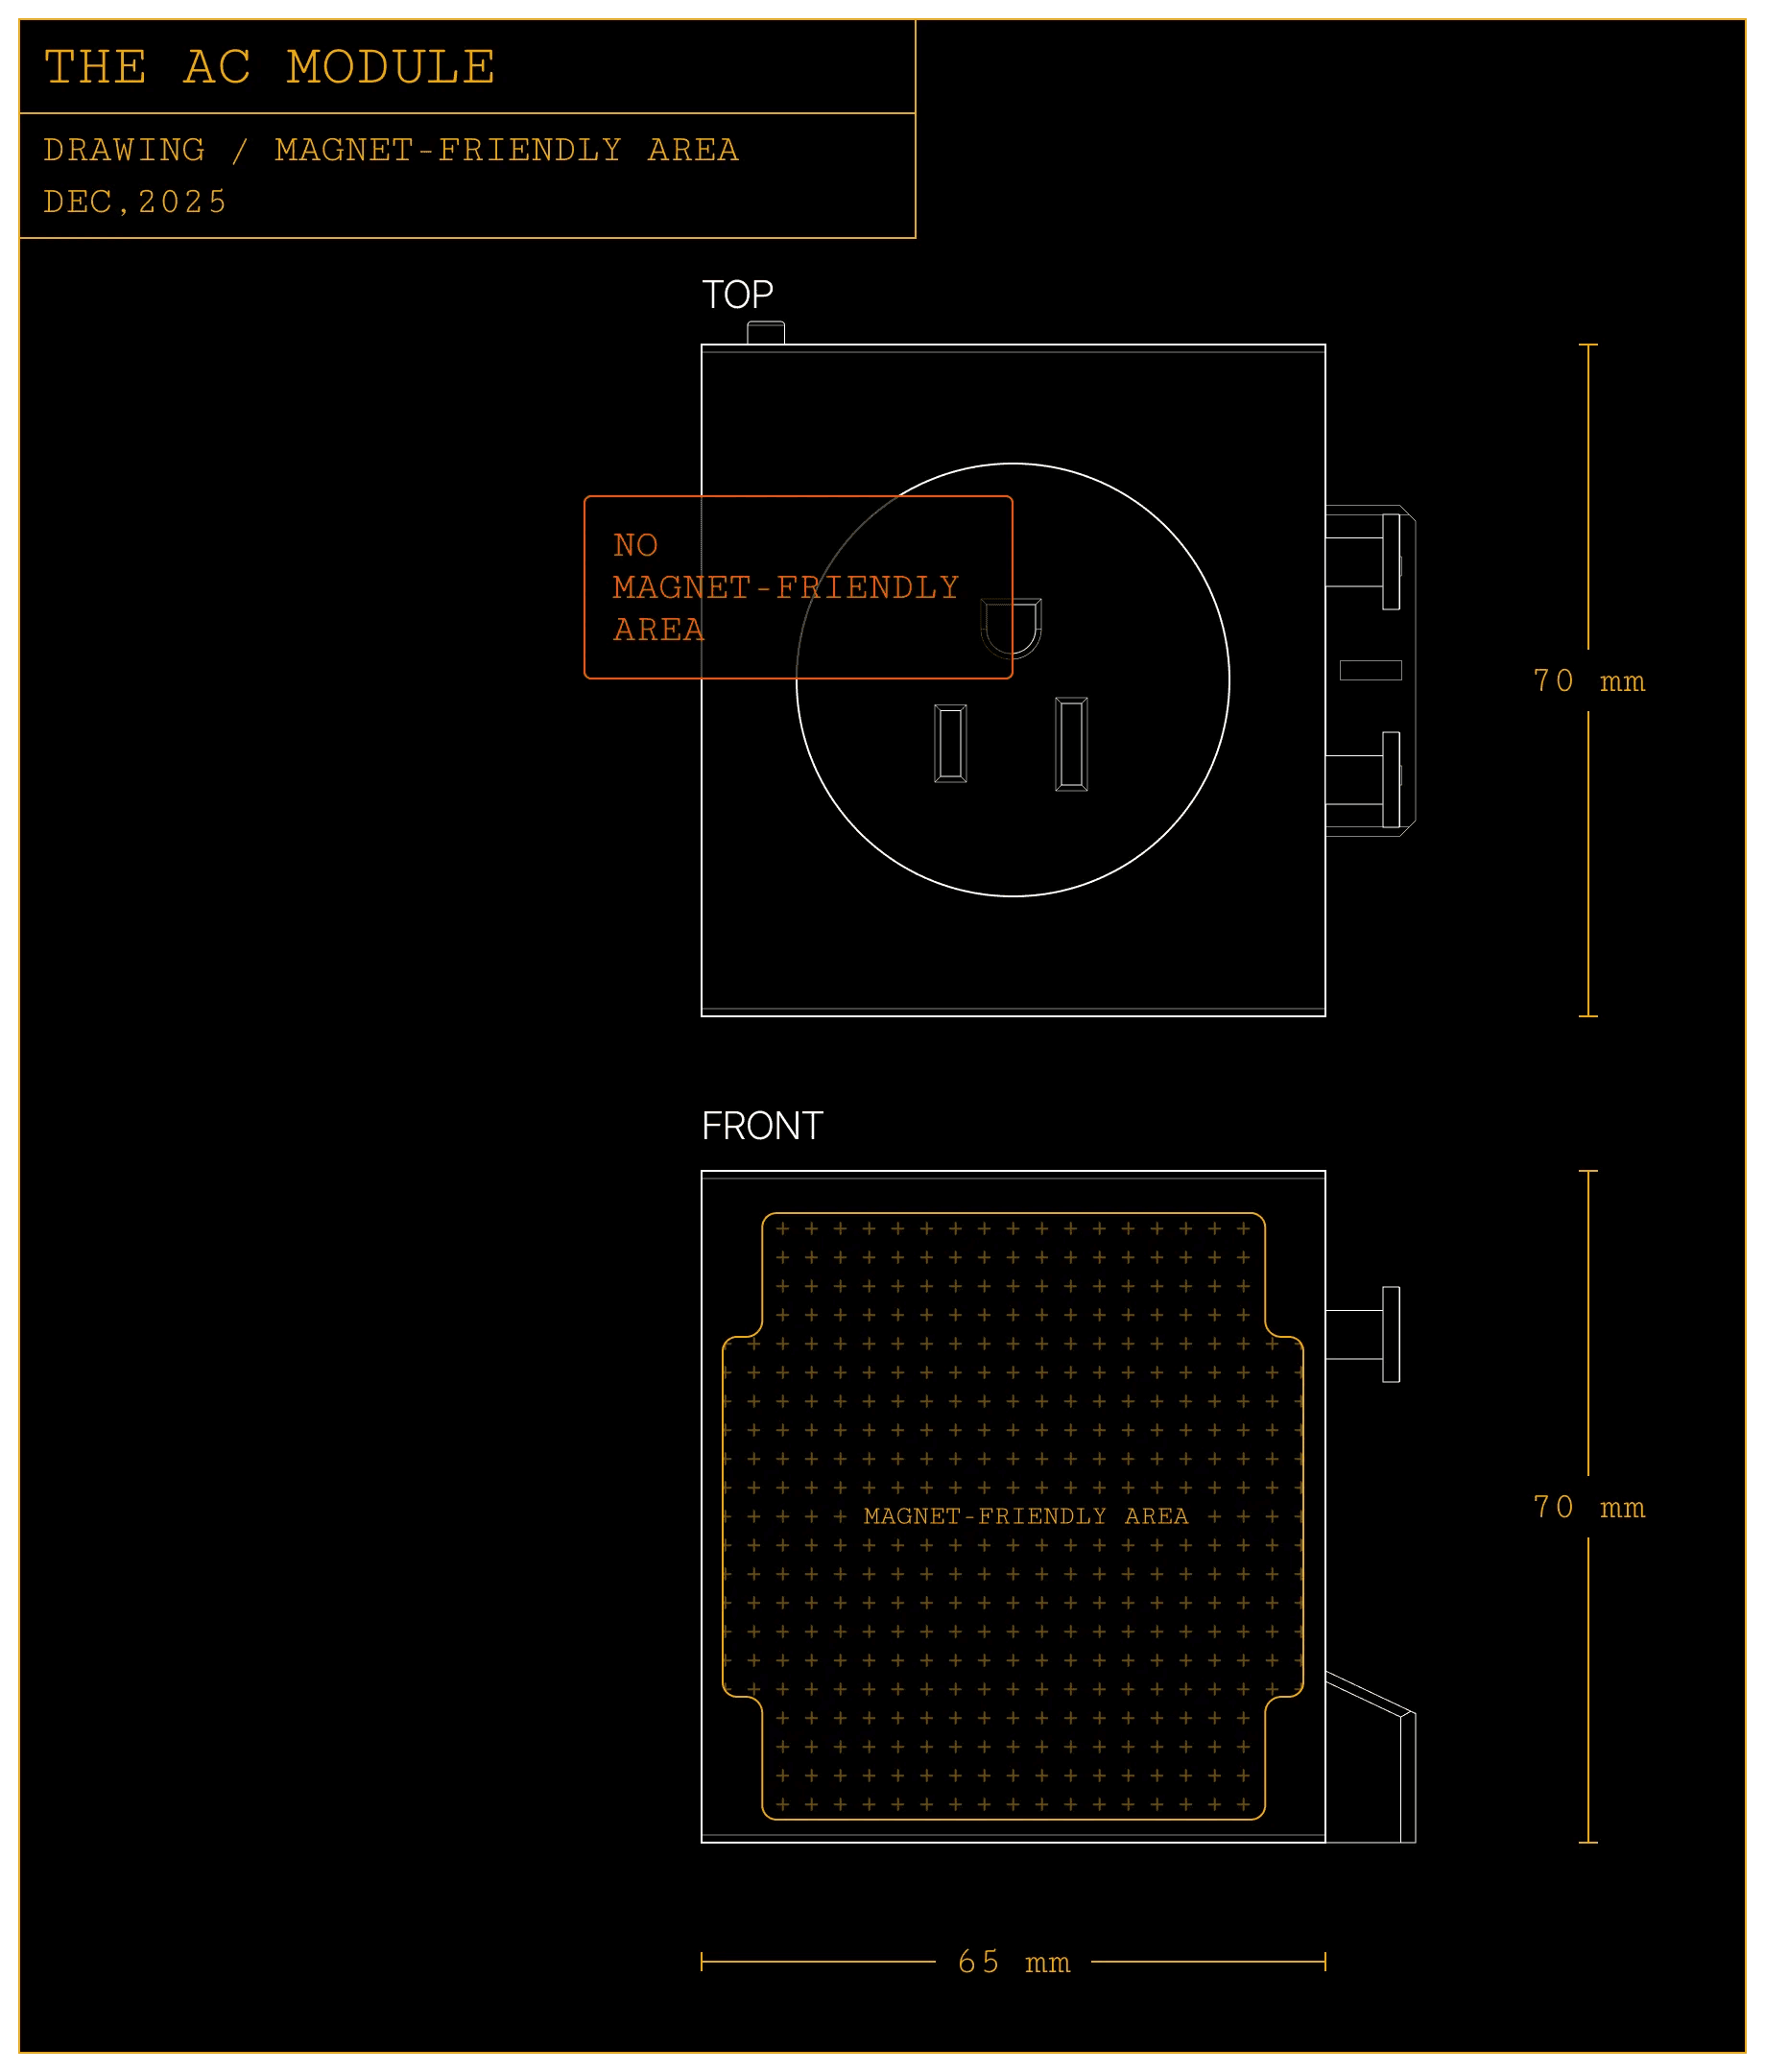
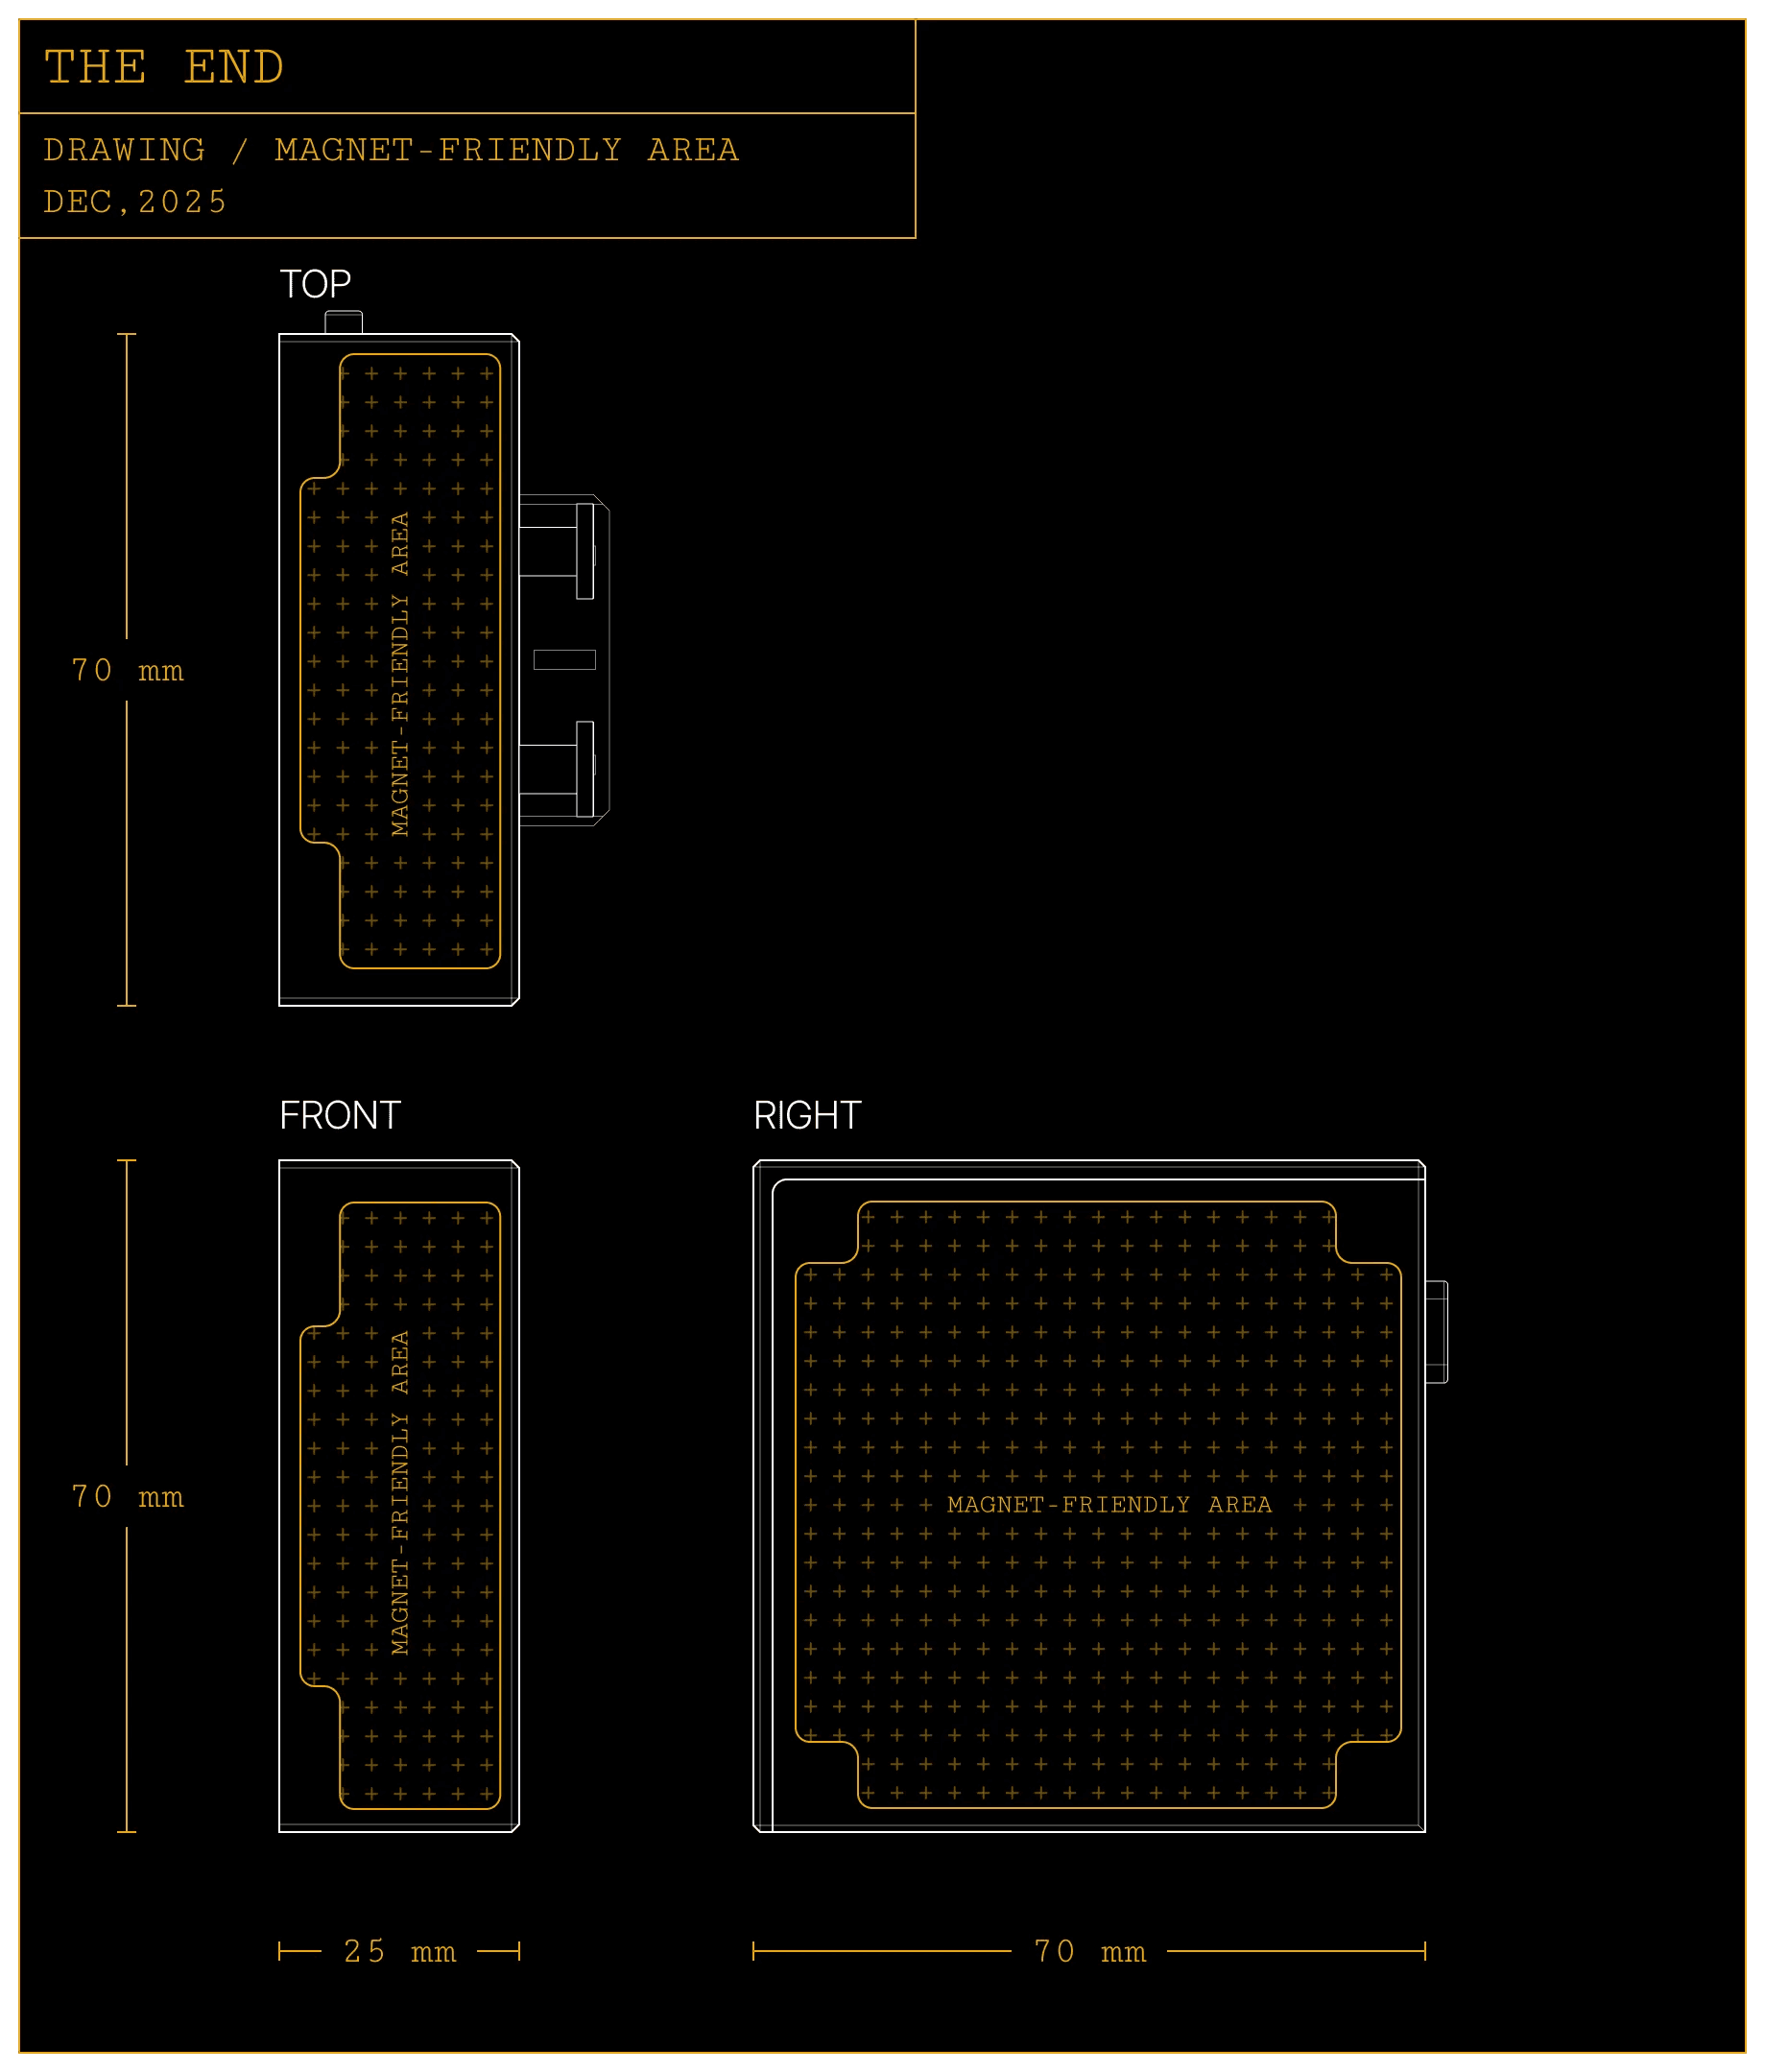
magnet-friendly surfaces
Most modules include magnet-friendly surfaces, allowing you to attach magnetic accessories directly onto them
A magnet-friendly surface can attract magnets, but it is not magnetic itself.
Because the surfaces are smooth and flat, they also work well for notes or reminders.
Here are some inspirations to get you started:

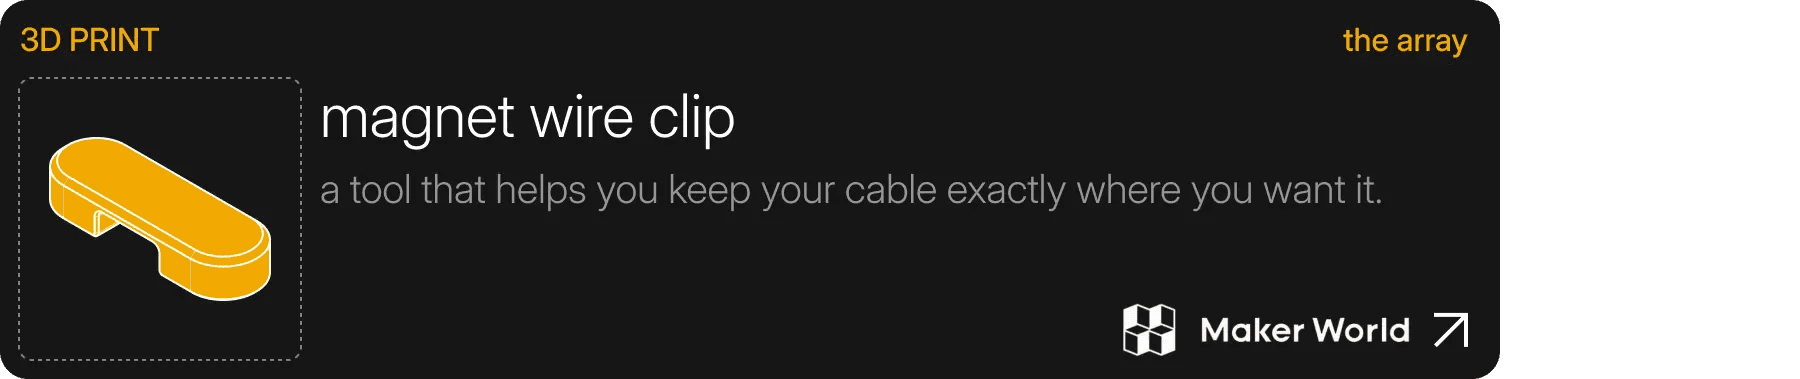
If you have a 3D printer, you can test out the magnet wire clip we designed as a starting point for creating your own accessories.
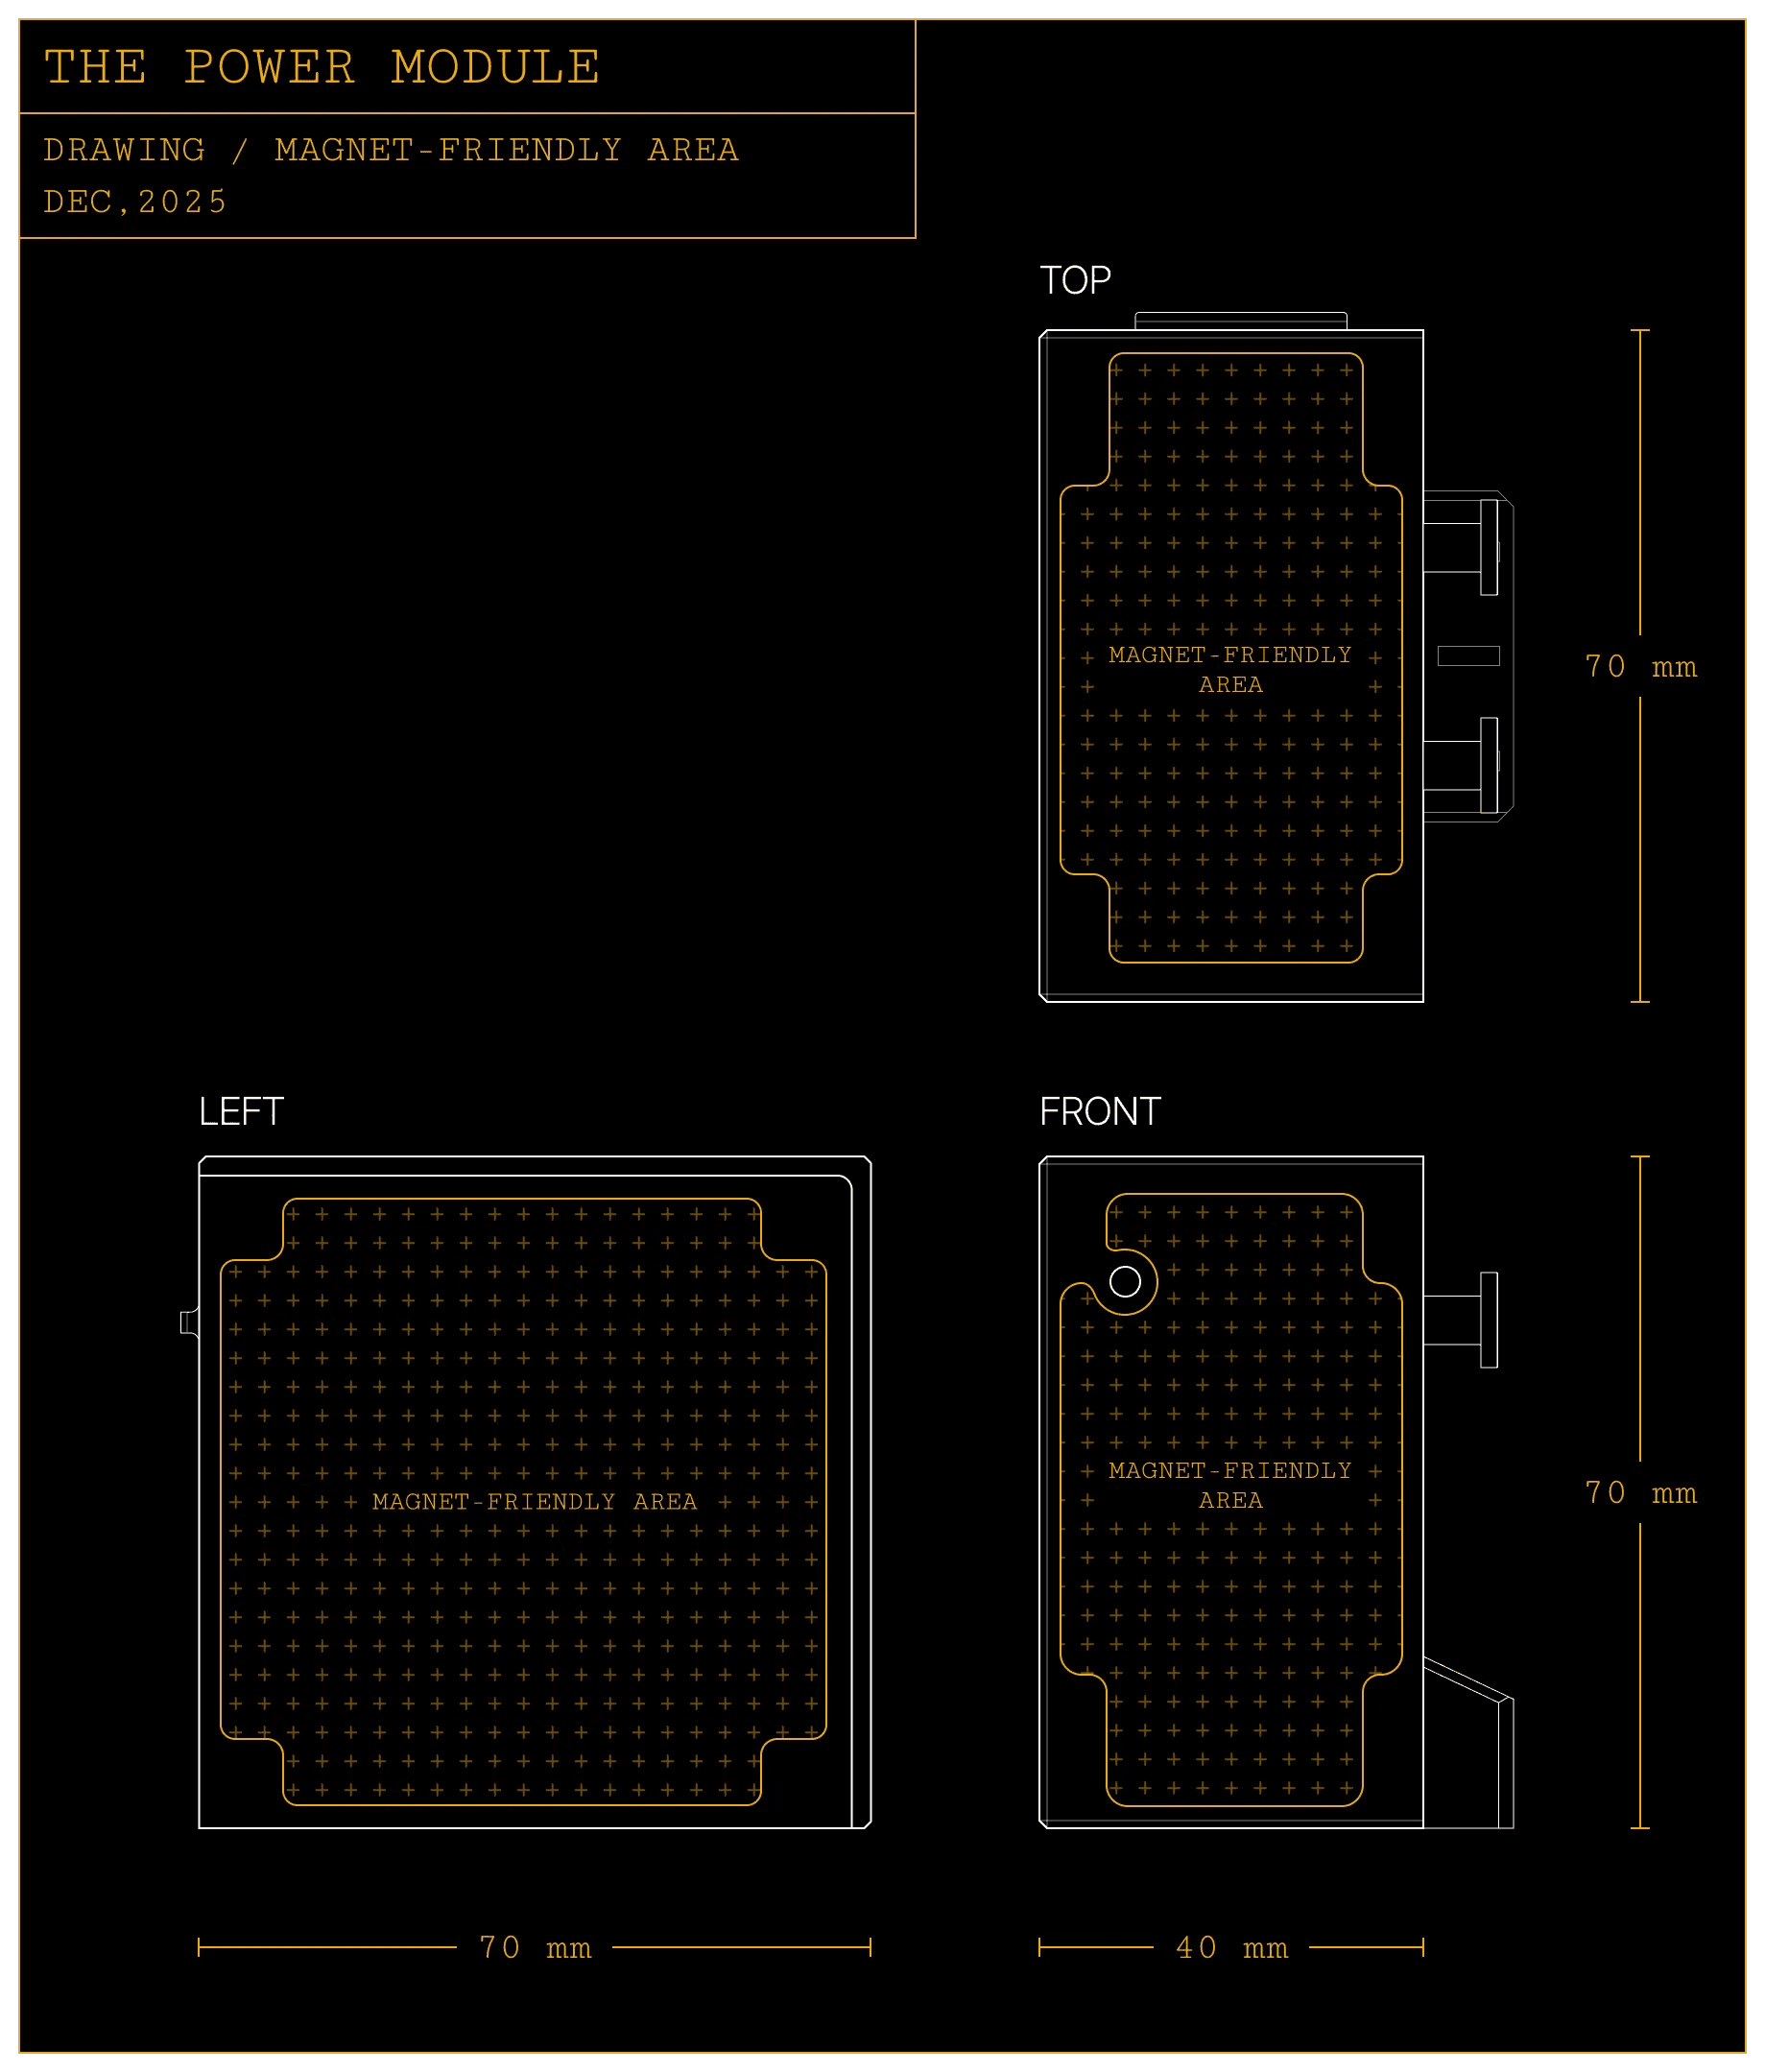
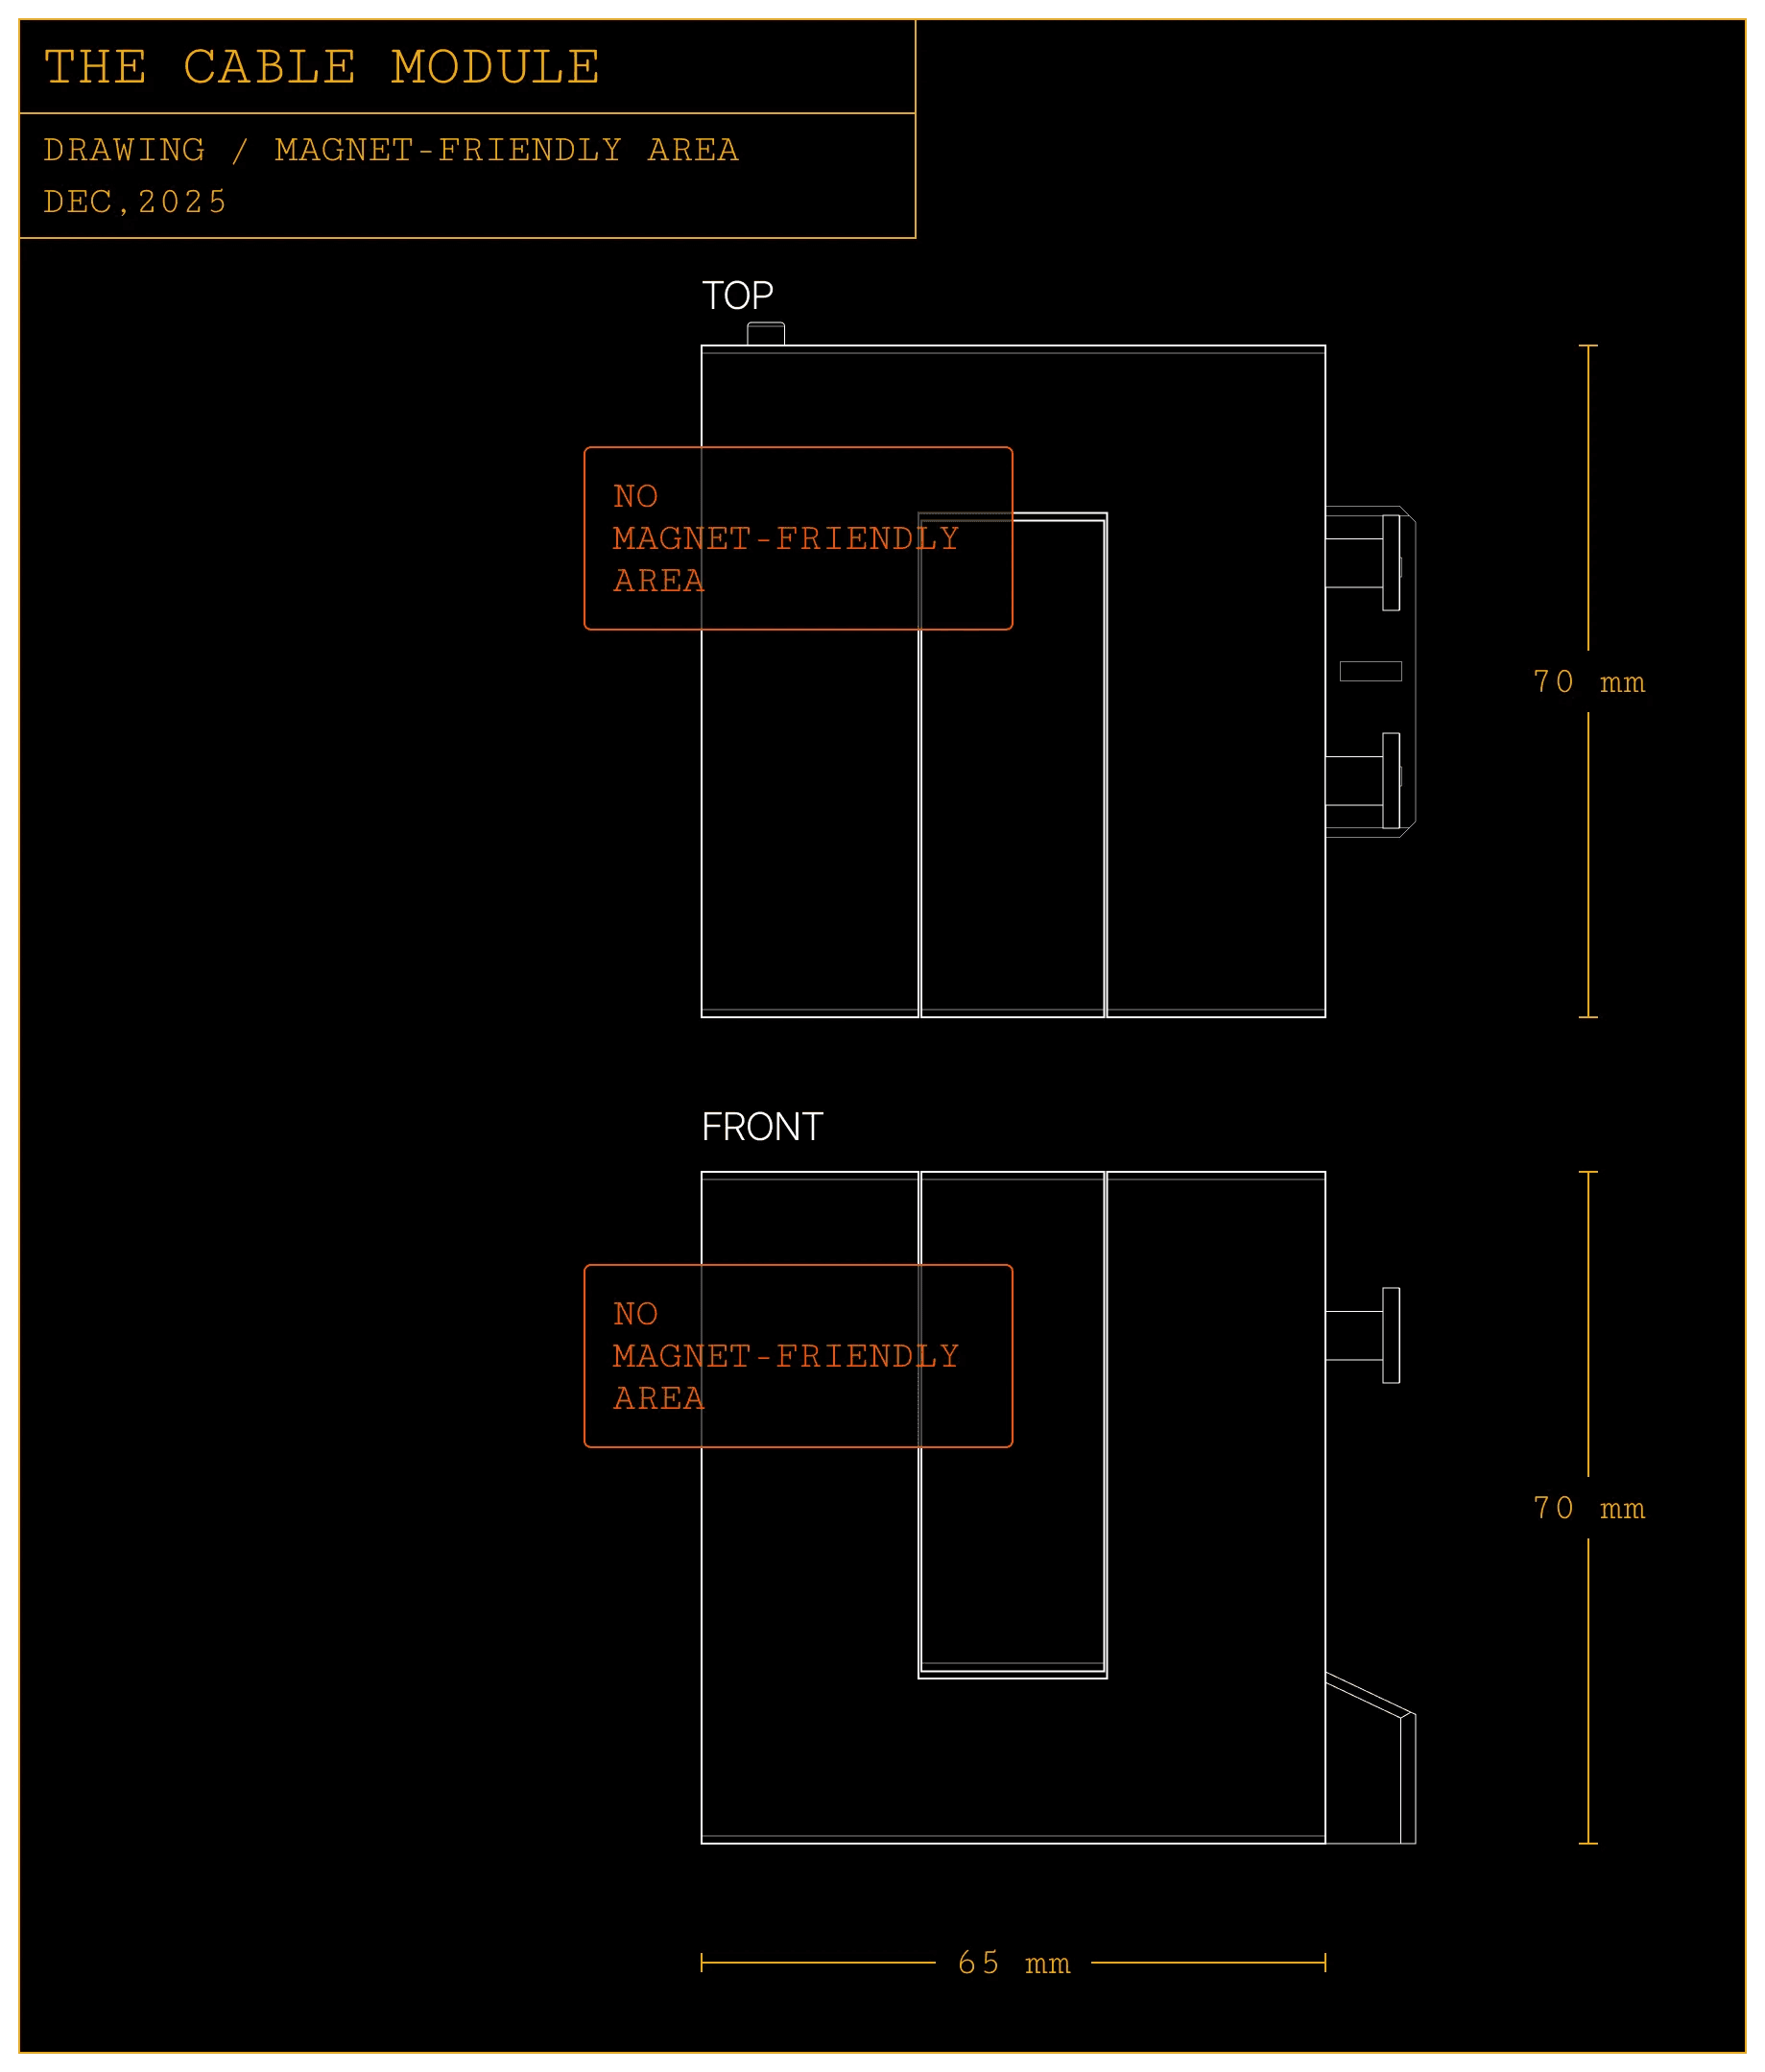
You can reference the dimension guides below when choosing or designing your magnetic accessories.
Please note that the cable module does not include a magnet-friendly surface.
Avoid placing heavy objects or items with weak magnets on vertical surfaces, as they may slide or fall.
threaded mounts
Each module has standard threaded holes on the bottom. You can design and attach your own accessories.
The threaded holes are pre-installed with silicone pads by default. They provide friction against desk surface and help keep the array stable.
You can take off the pads and install customized accessories into the threaded holes.
A few examples of what you can build to make the array your own:
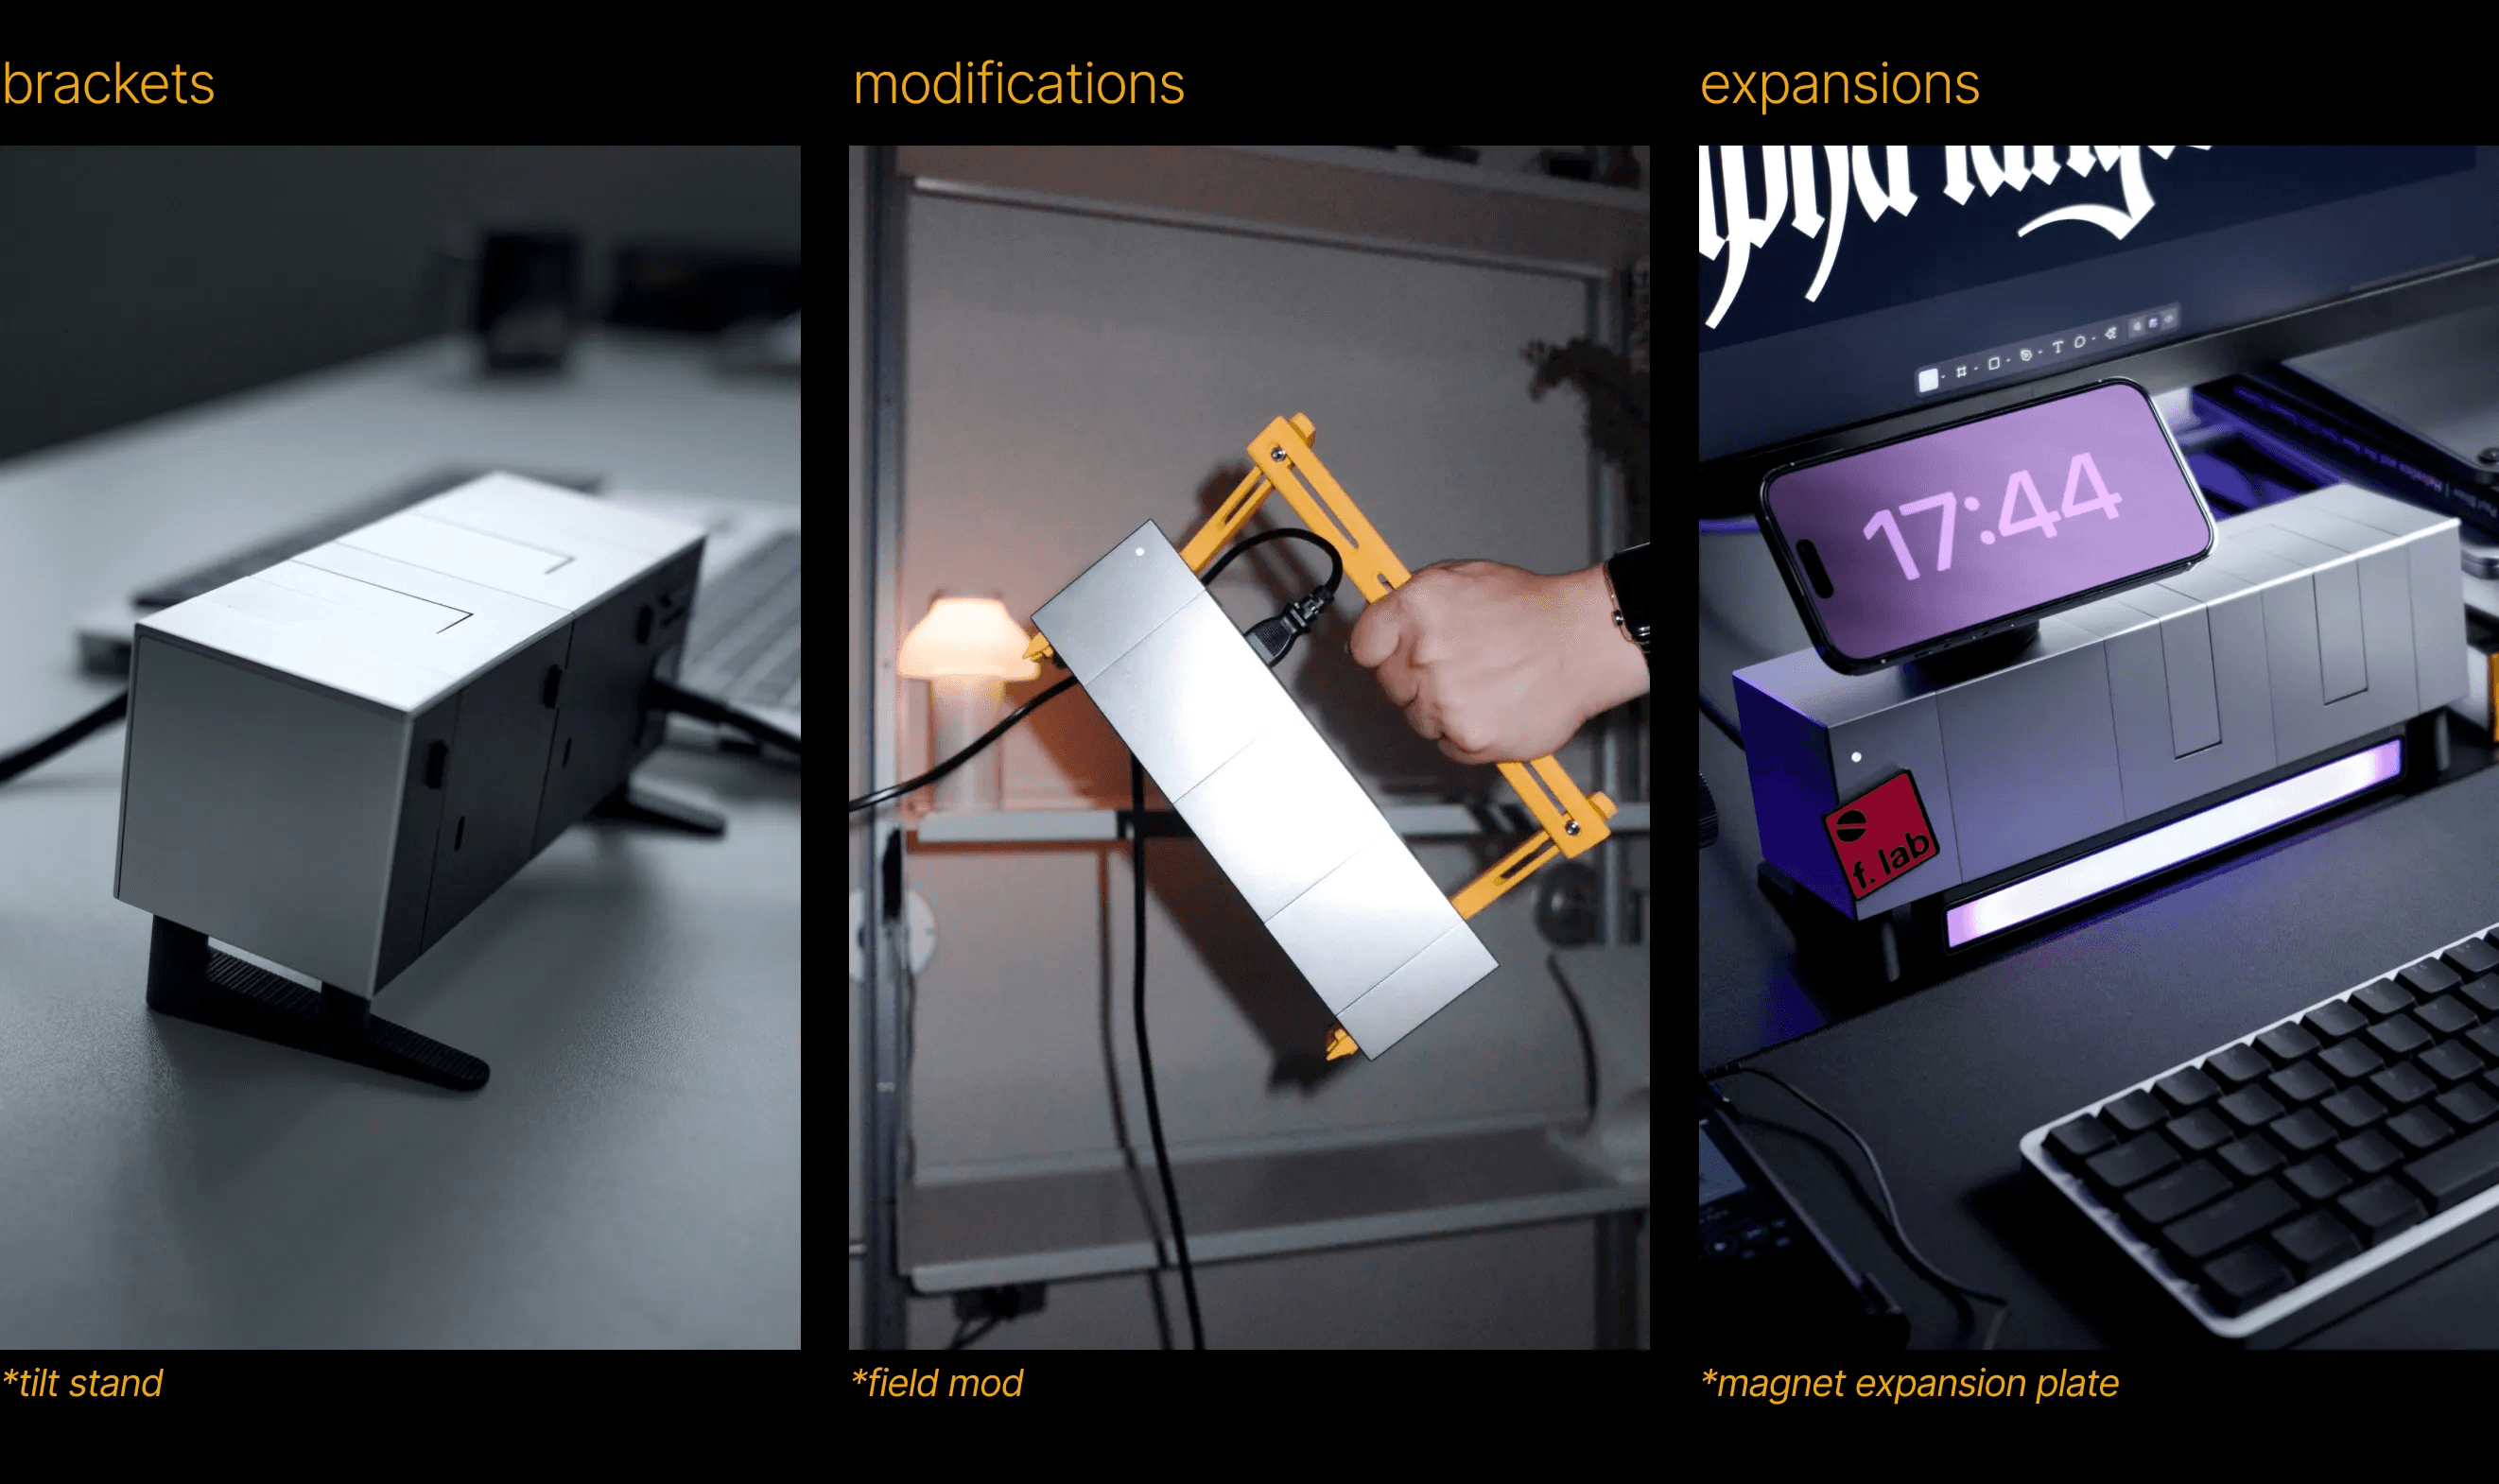
Refer to the dimension guide below when creating custom parts.
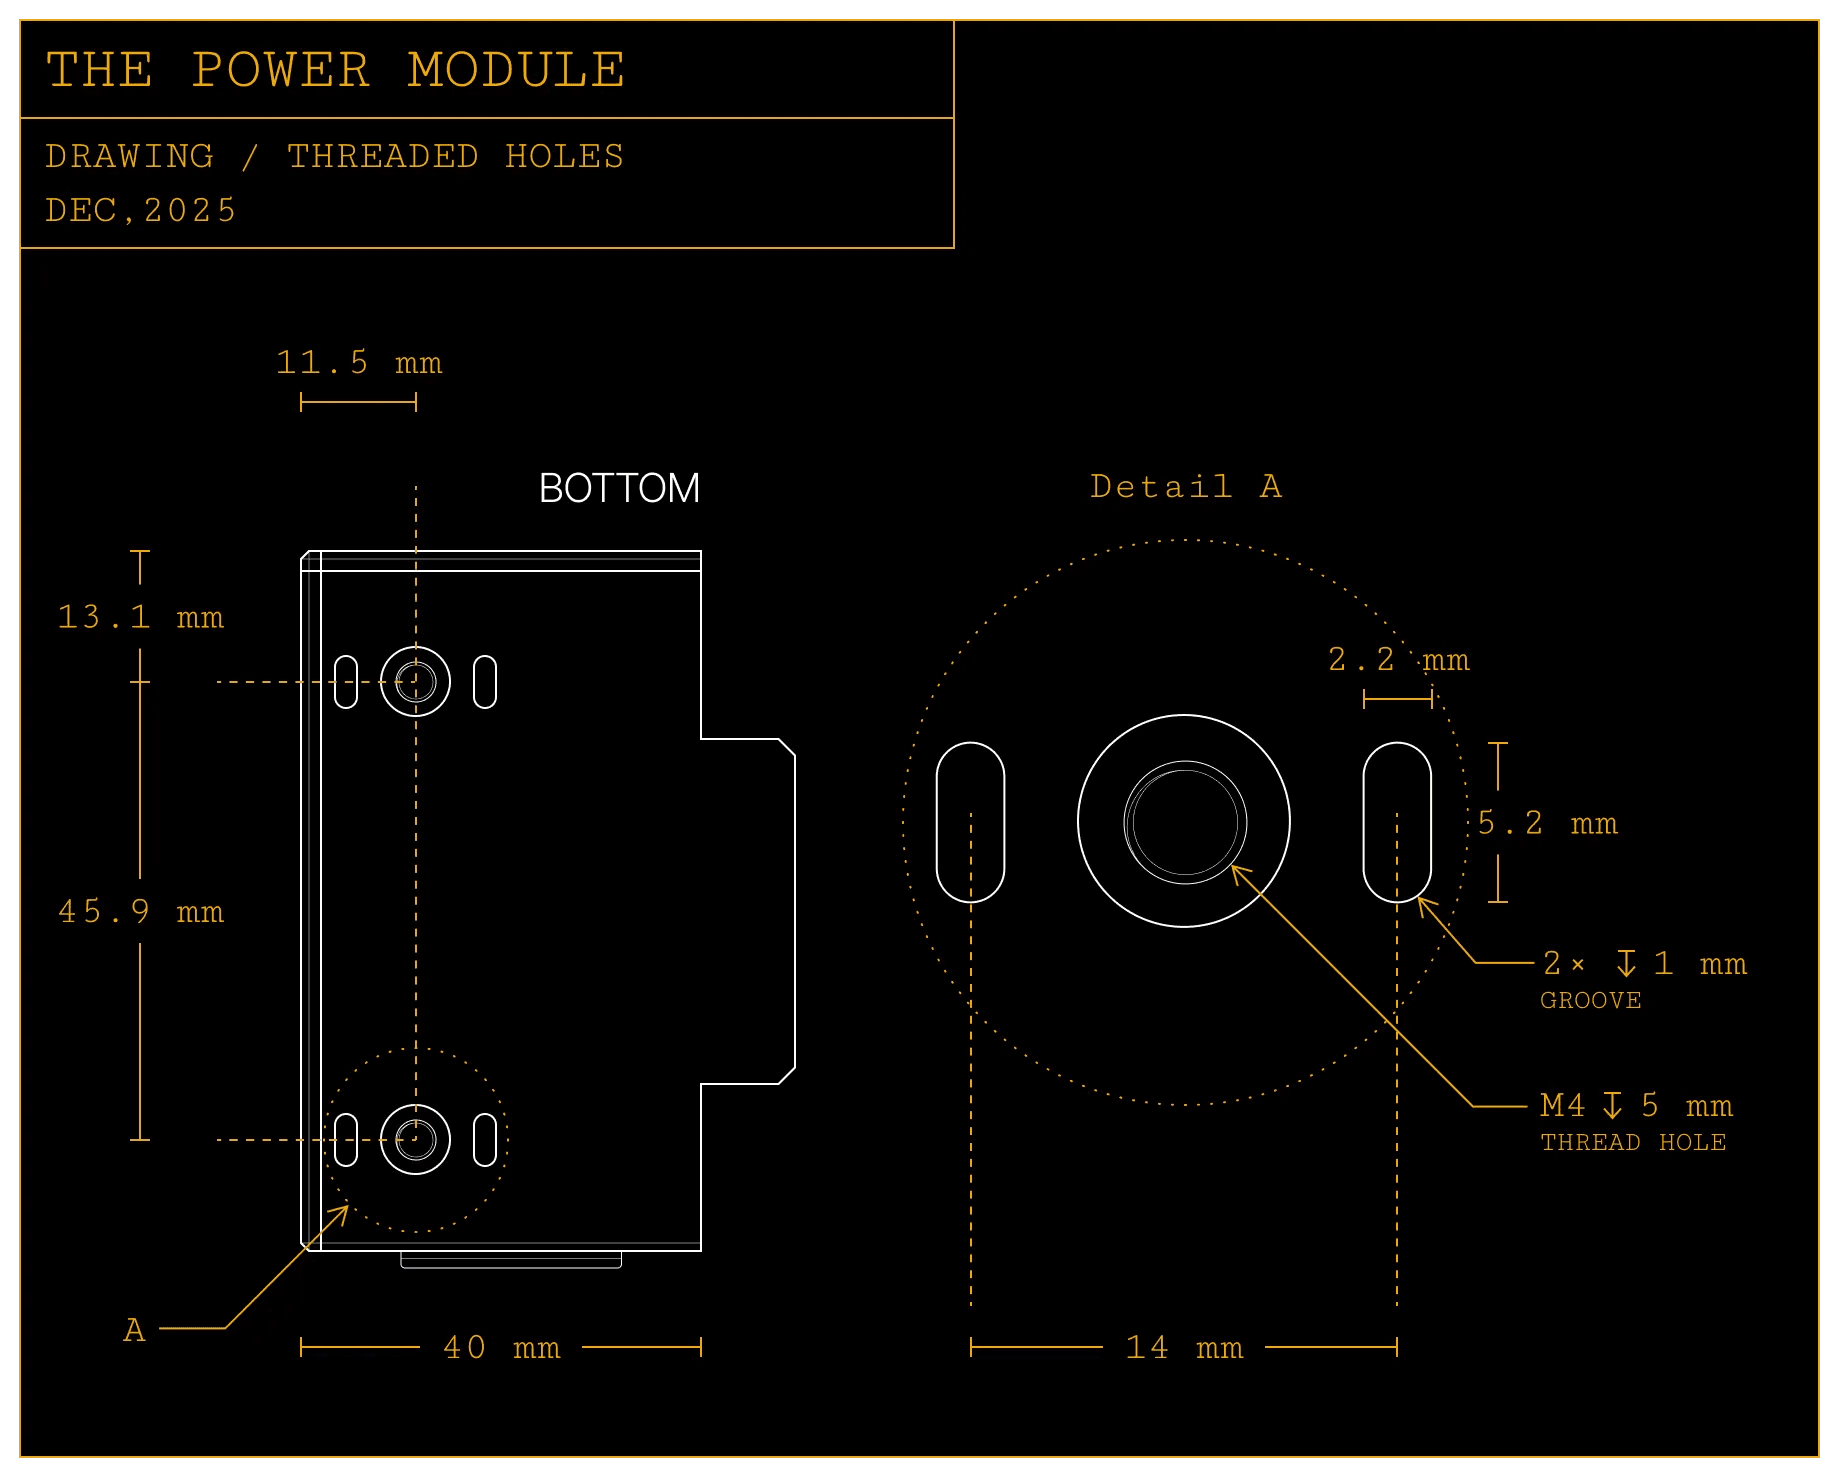
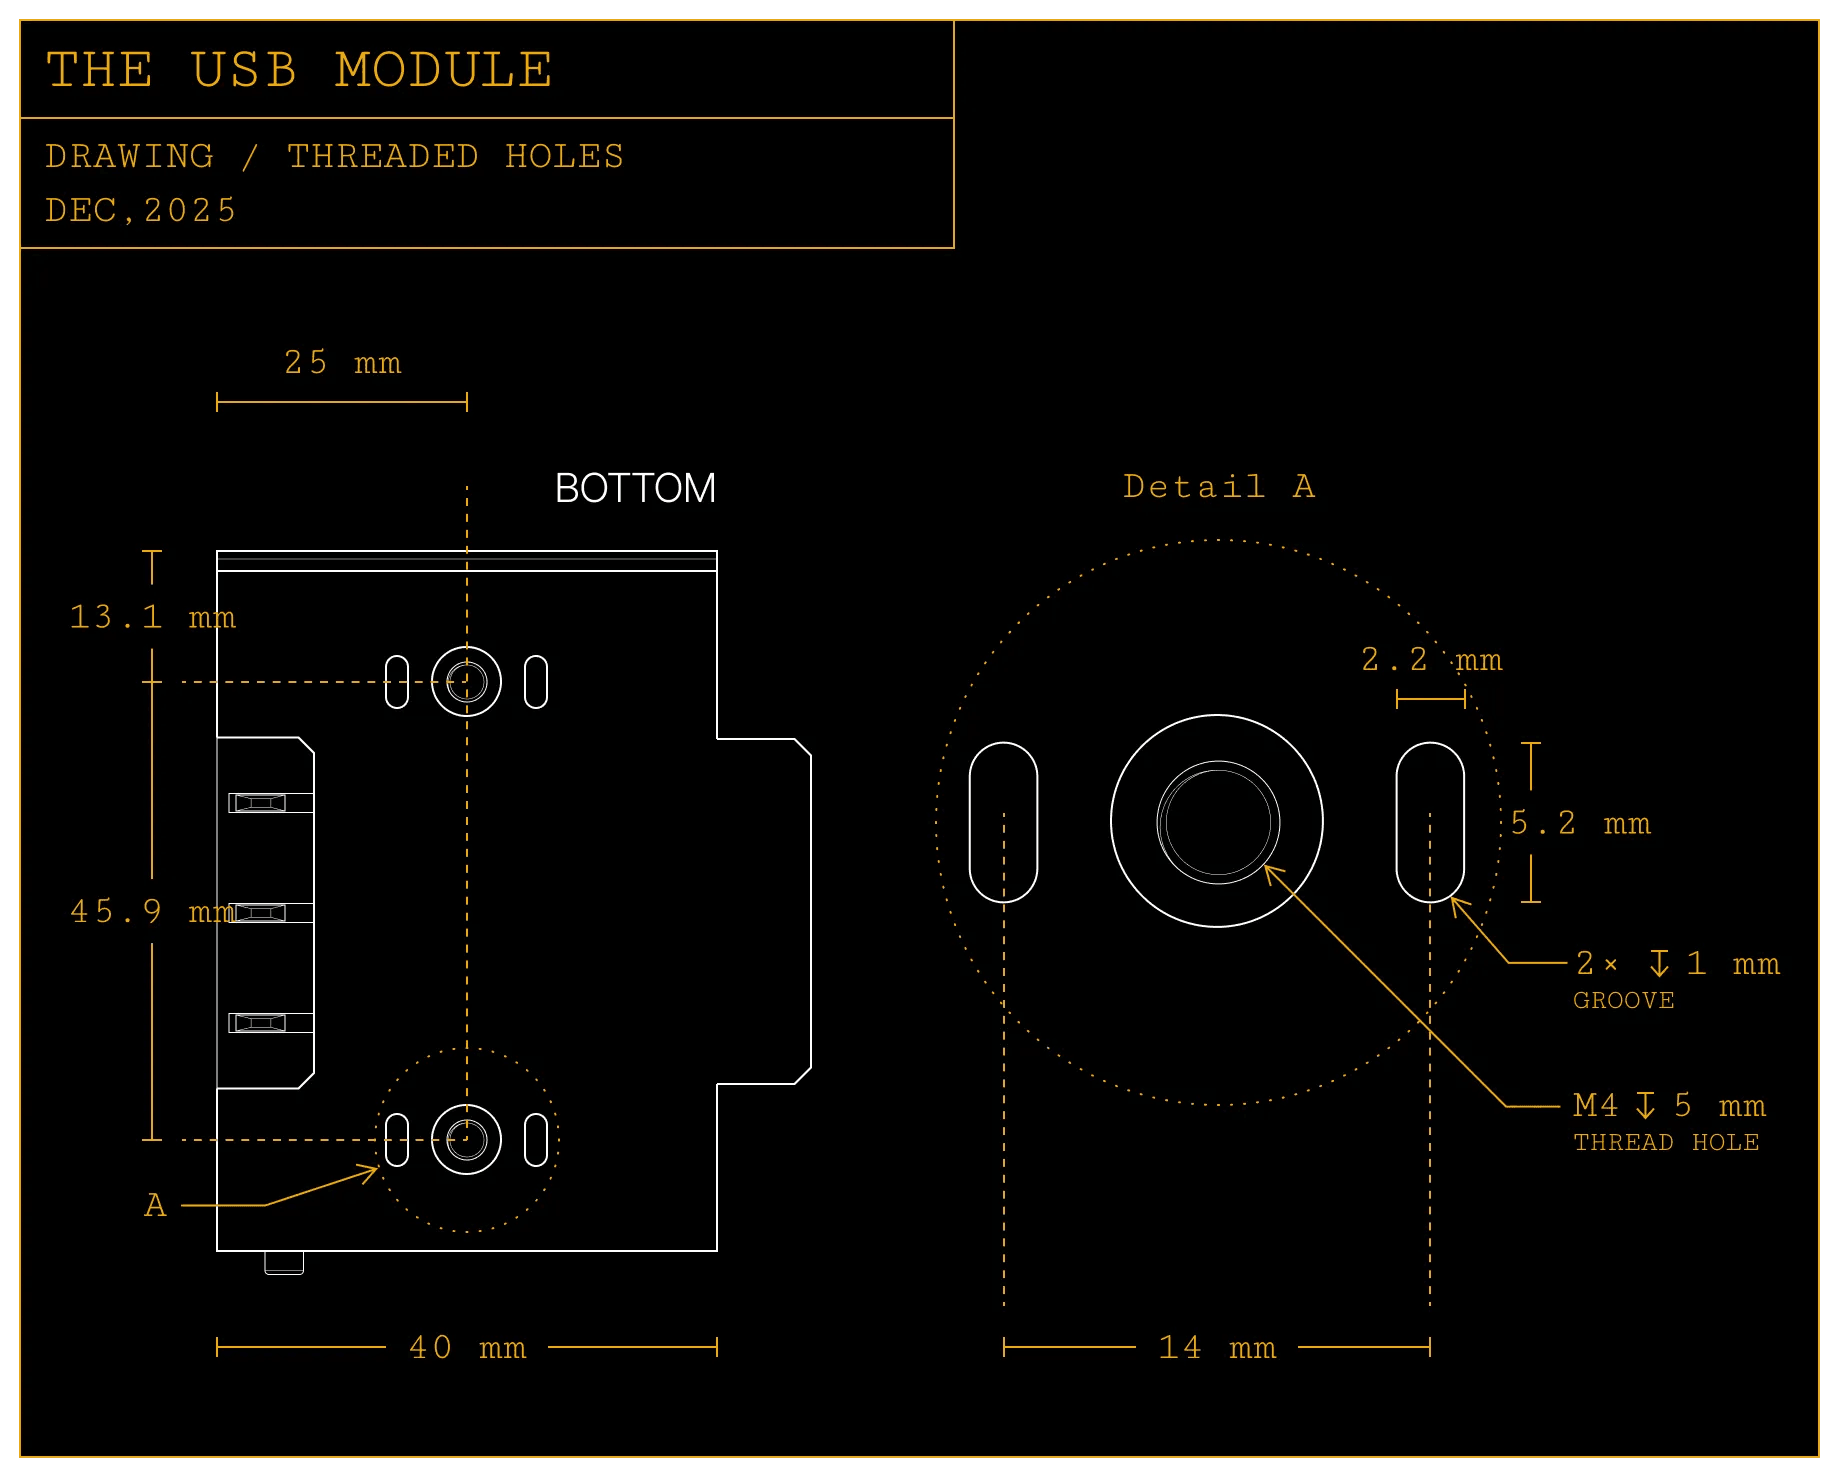
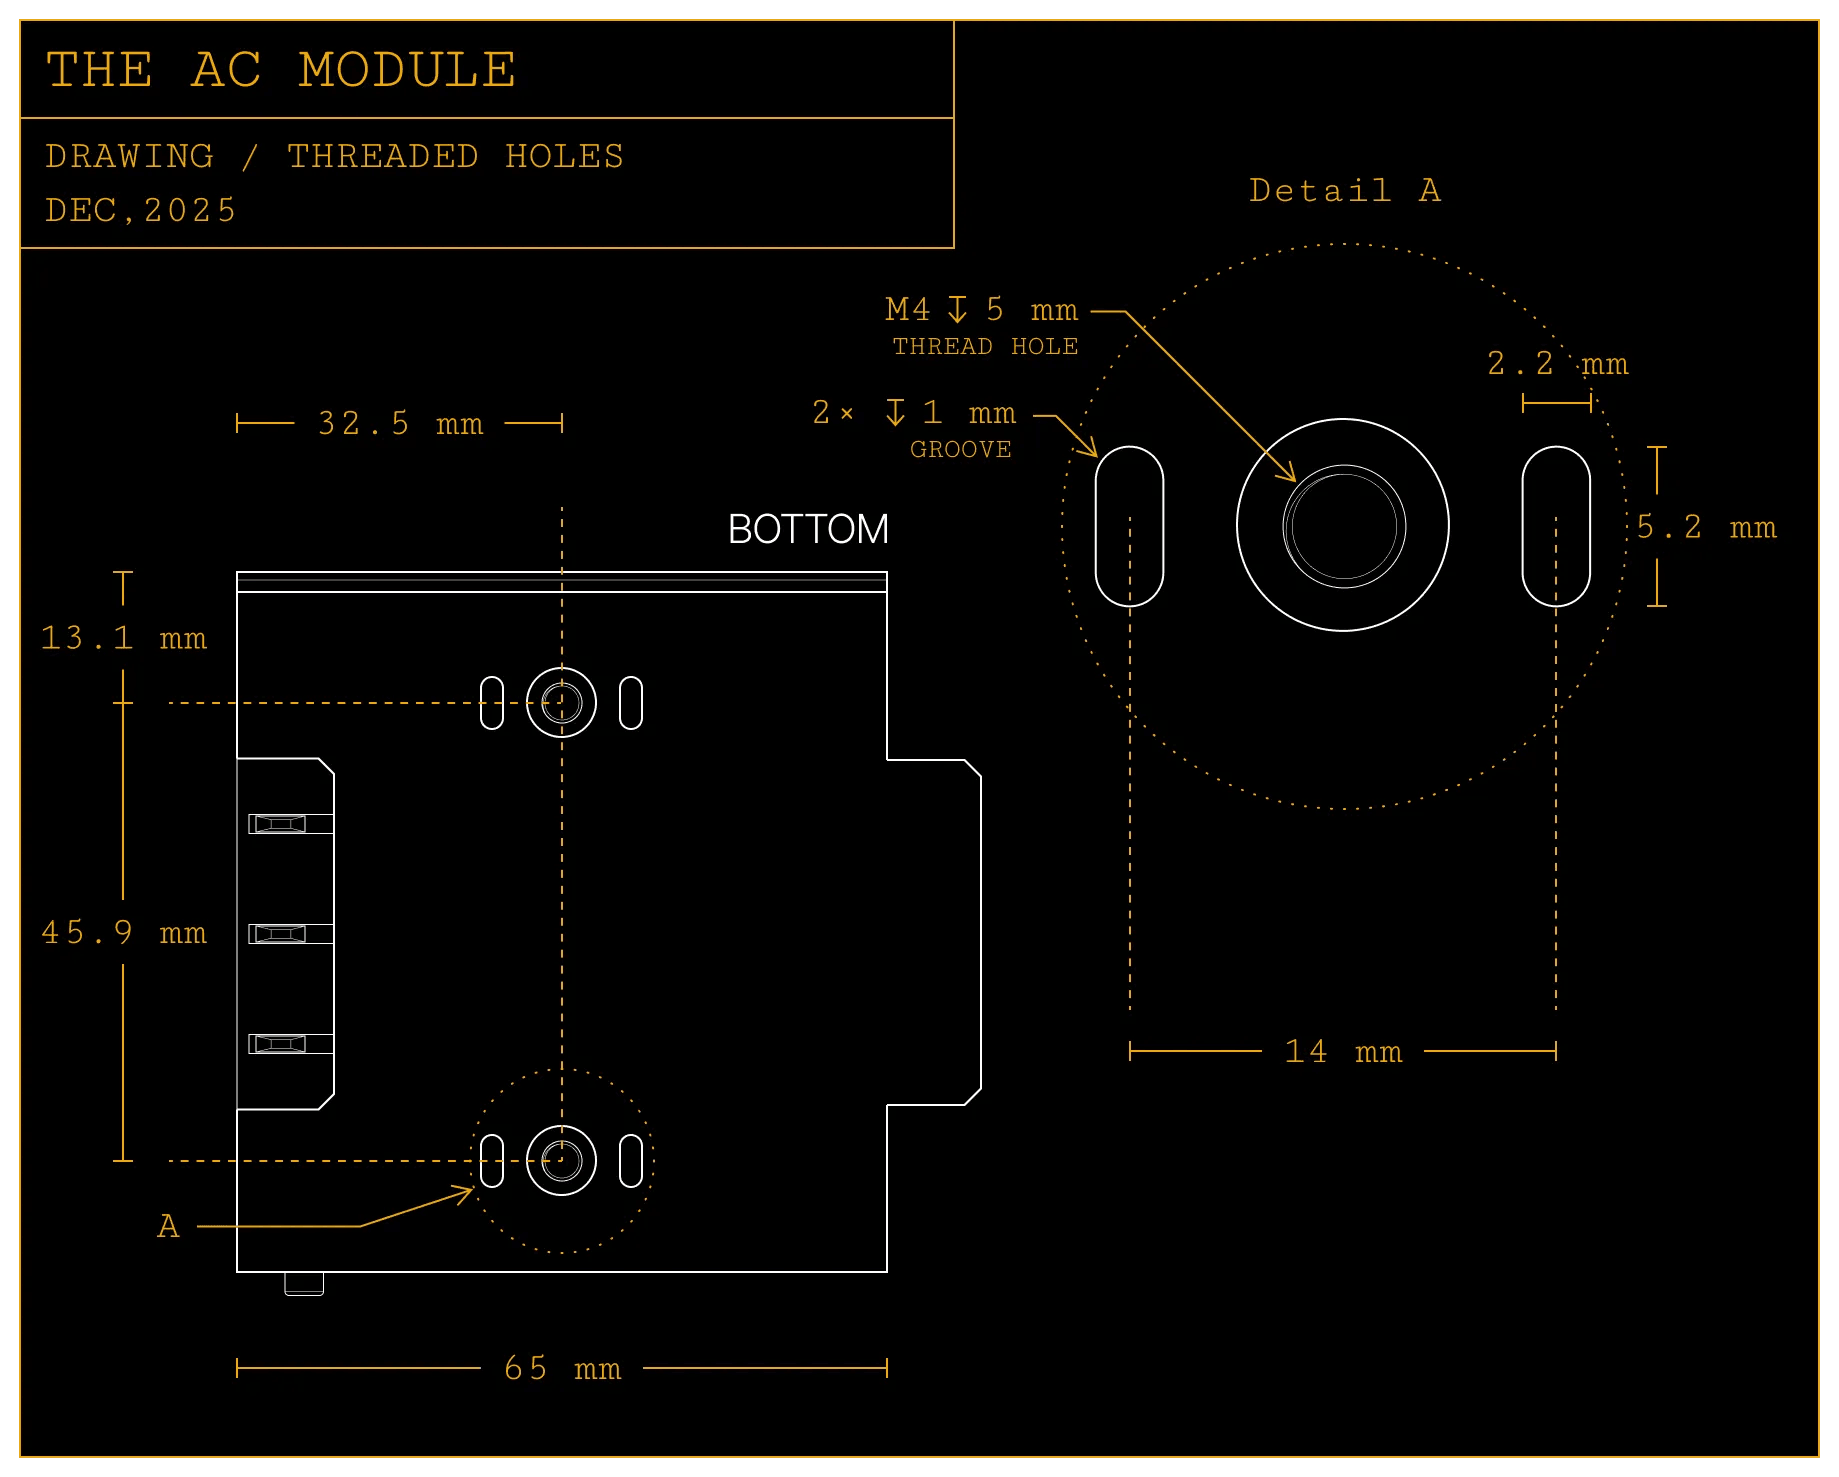
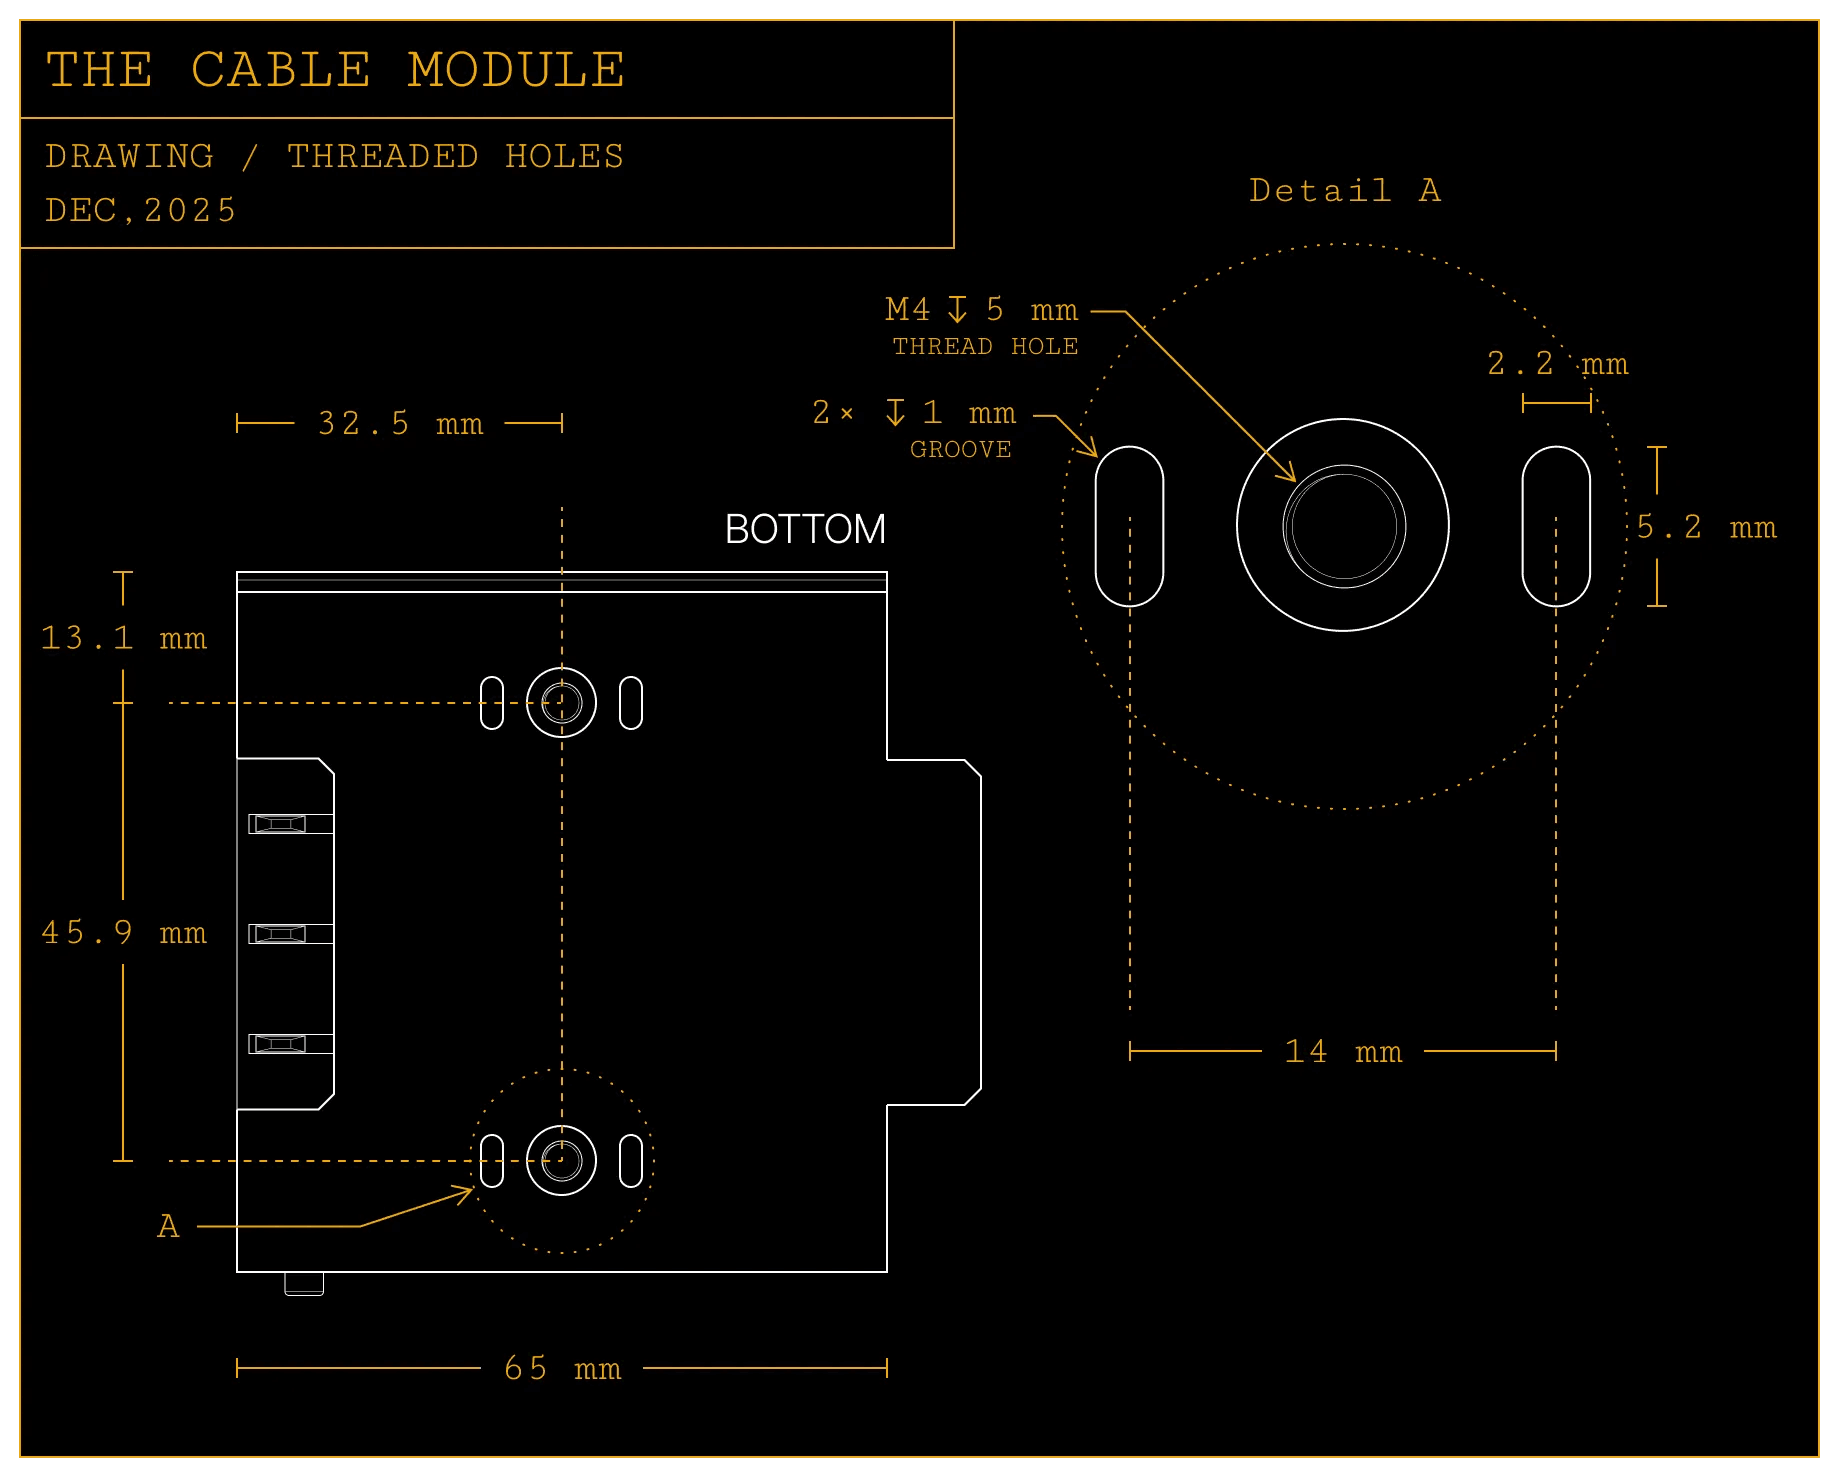
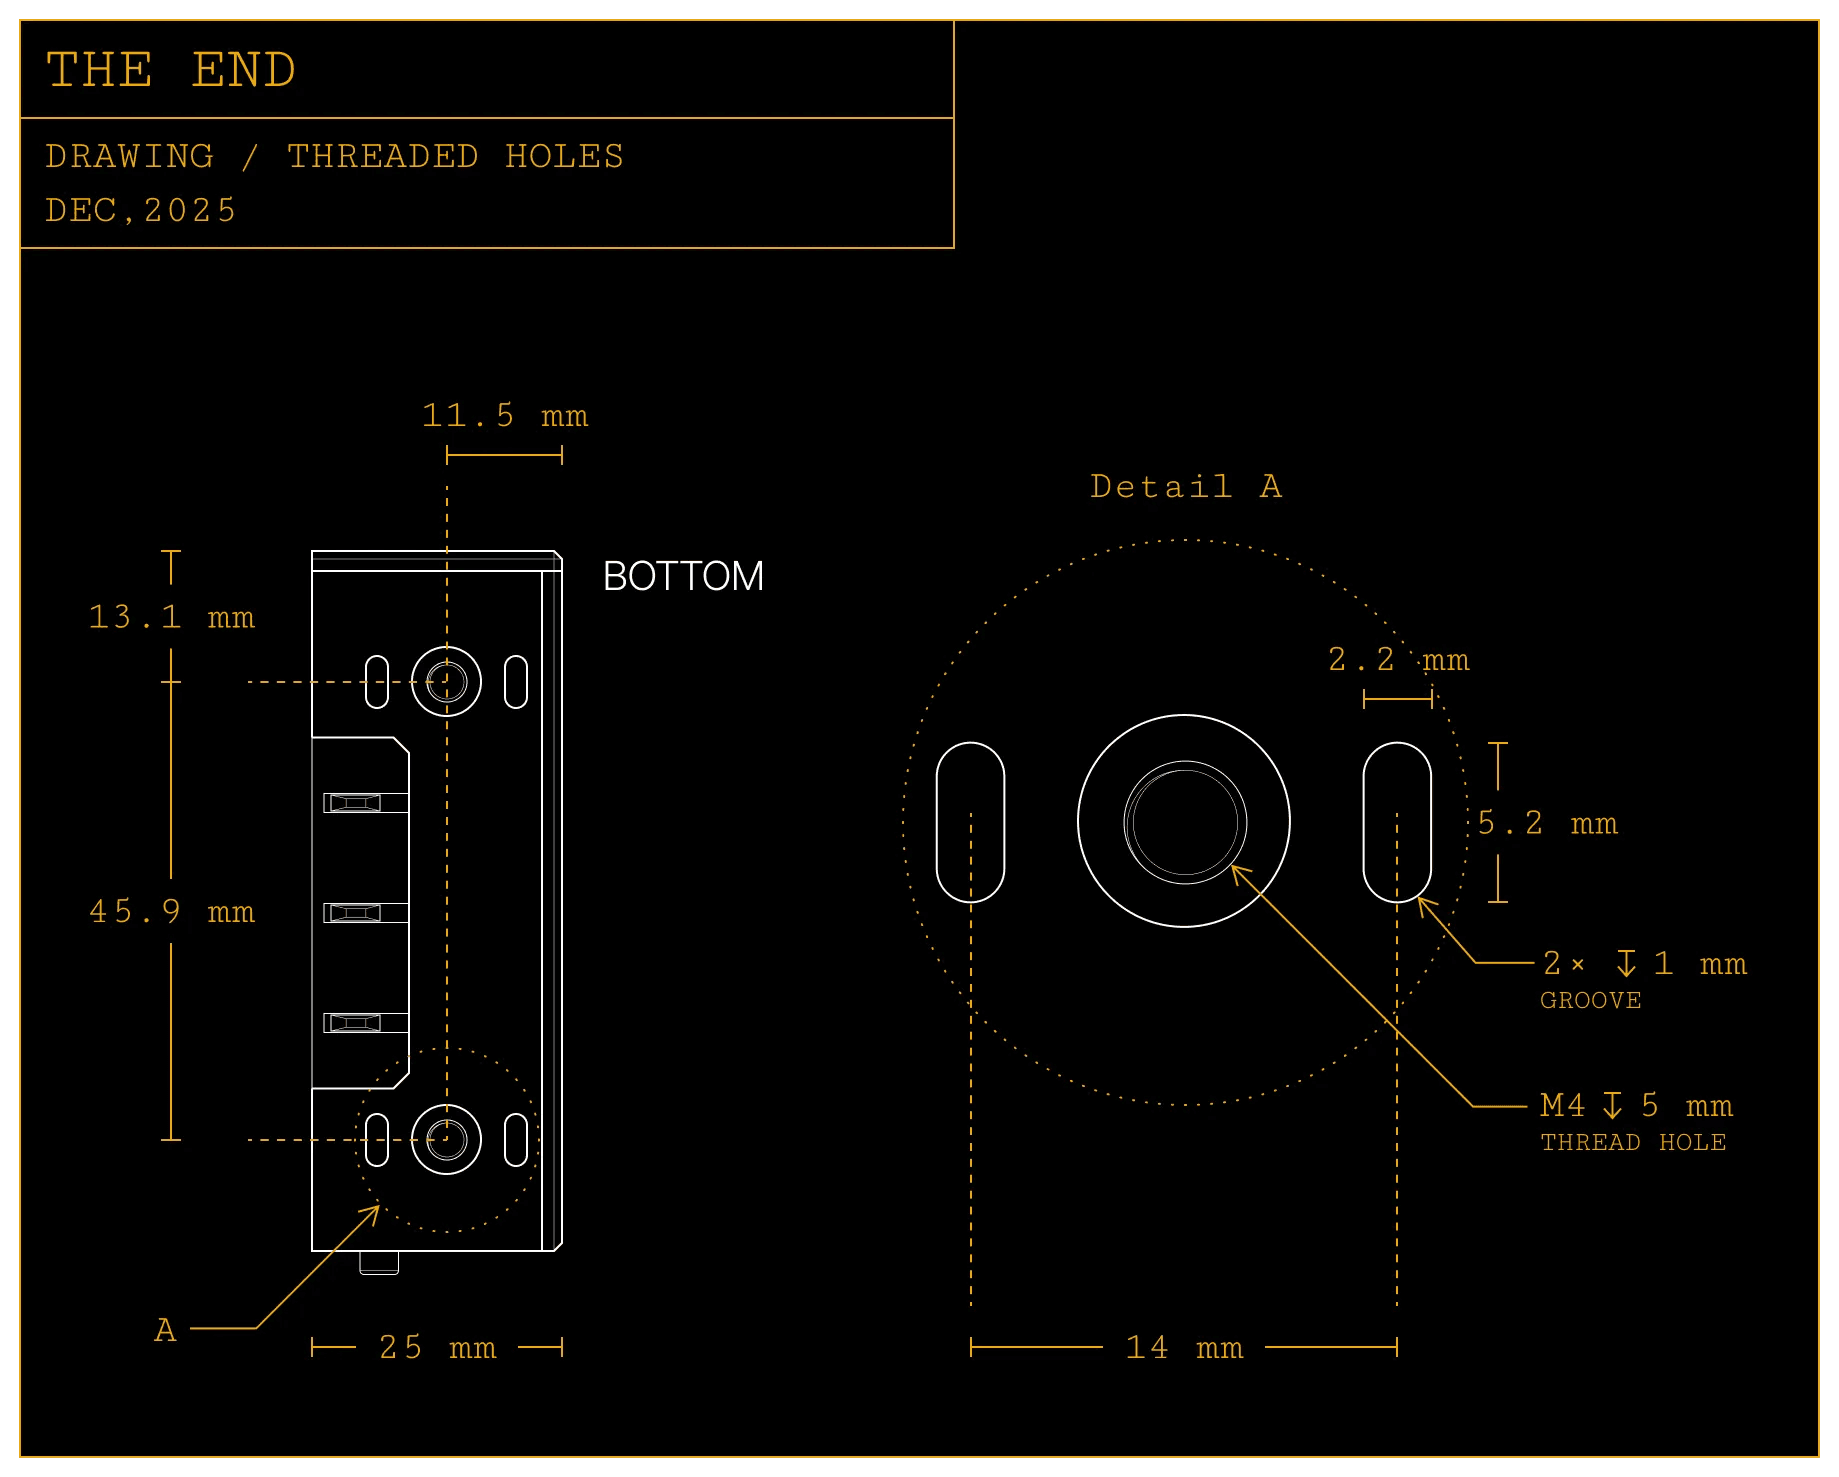
There are two grooves near the threaded hole that help with alignment when designing directional attachments.
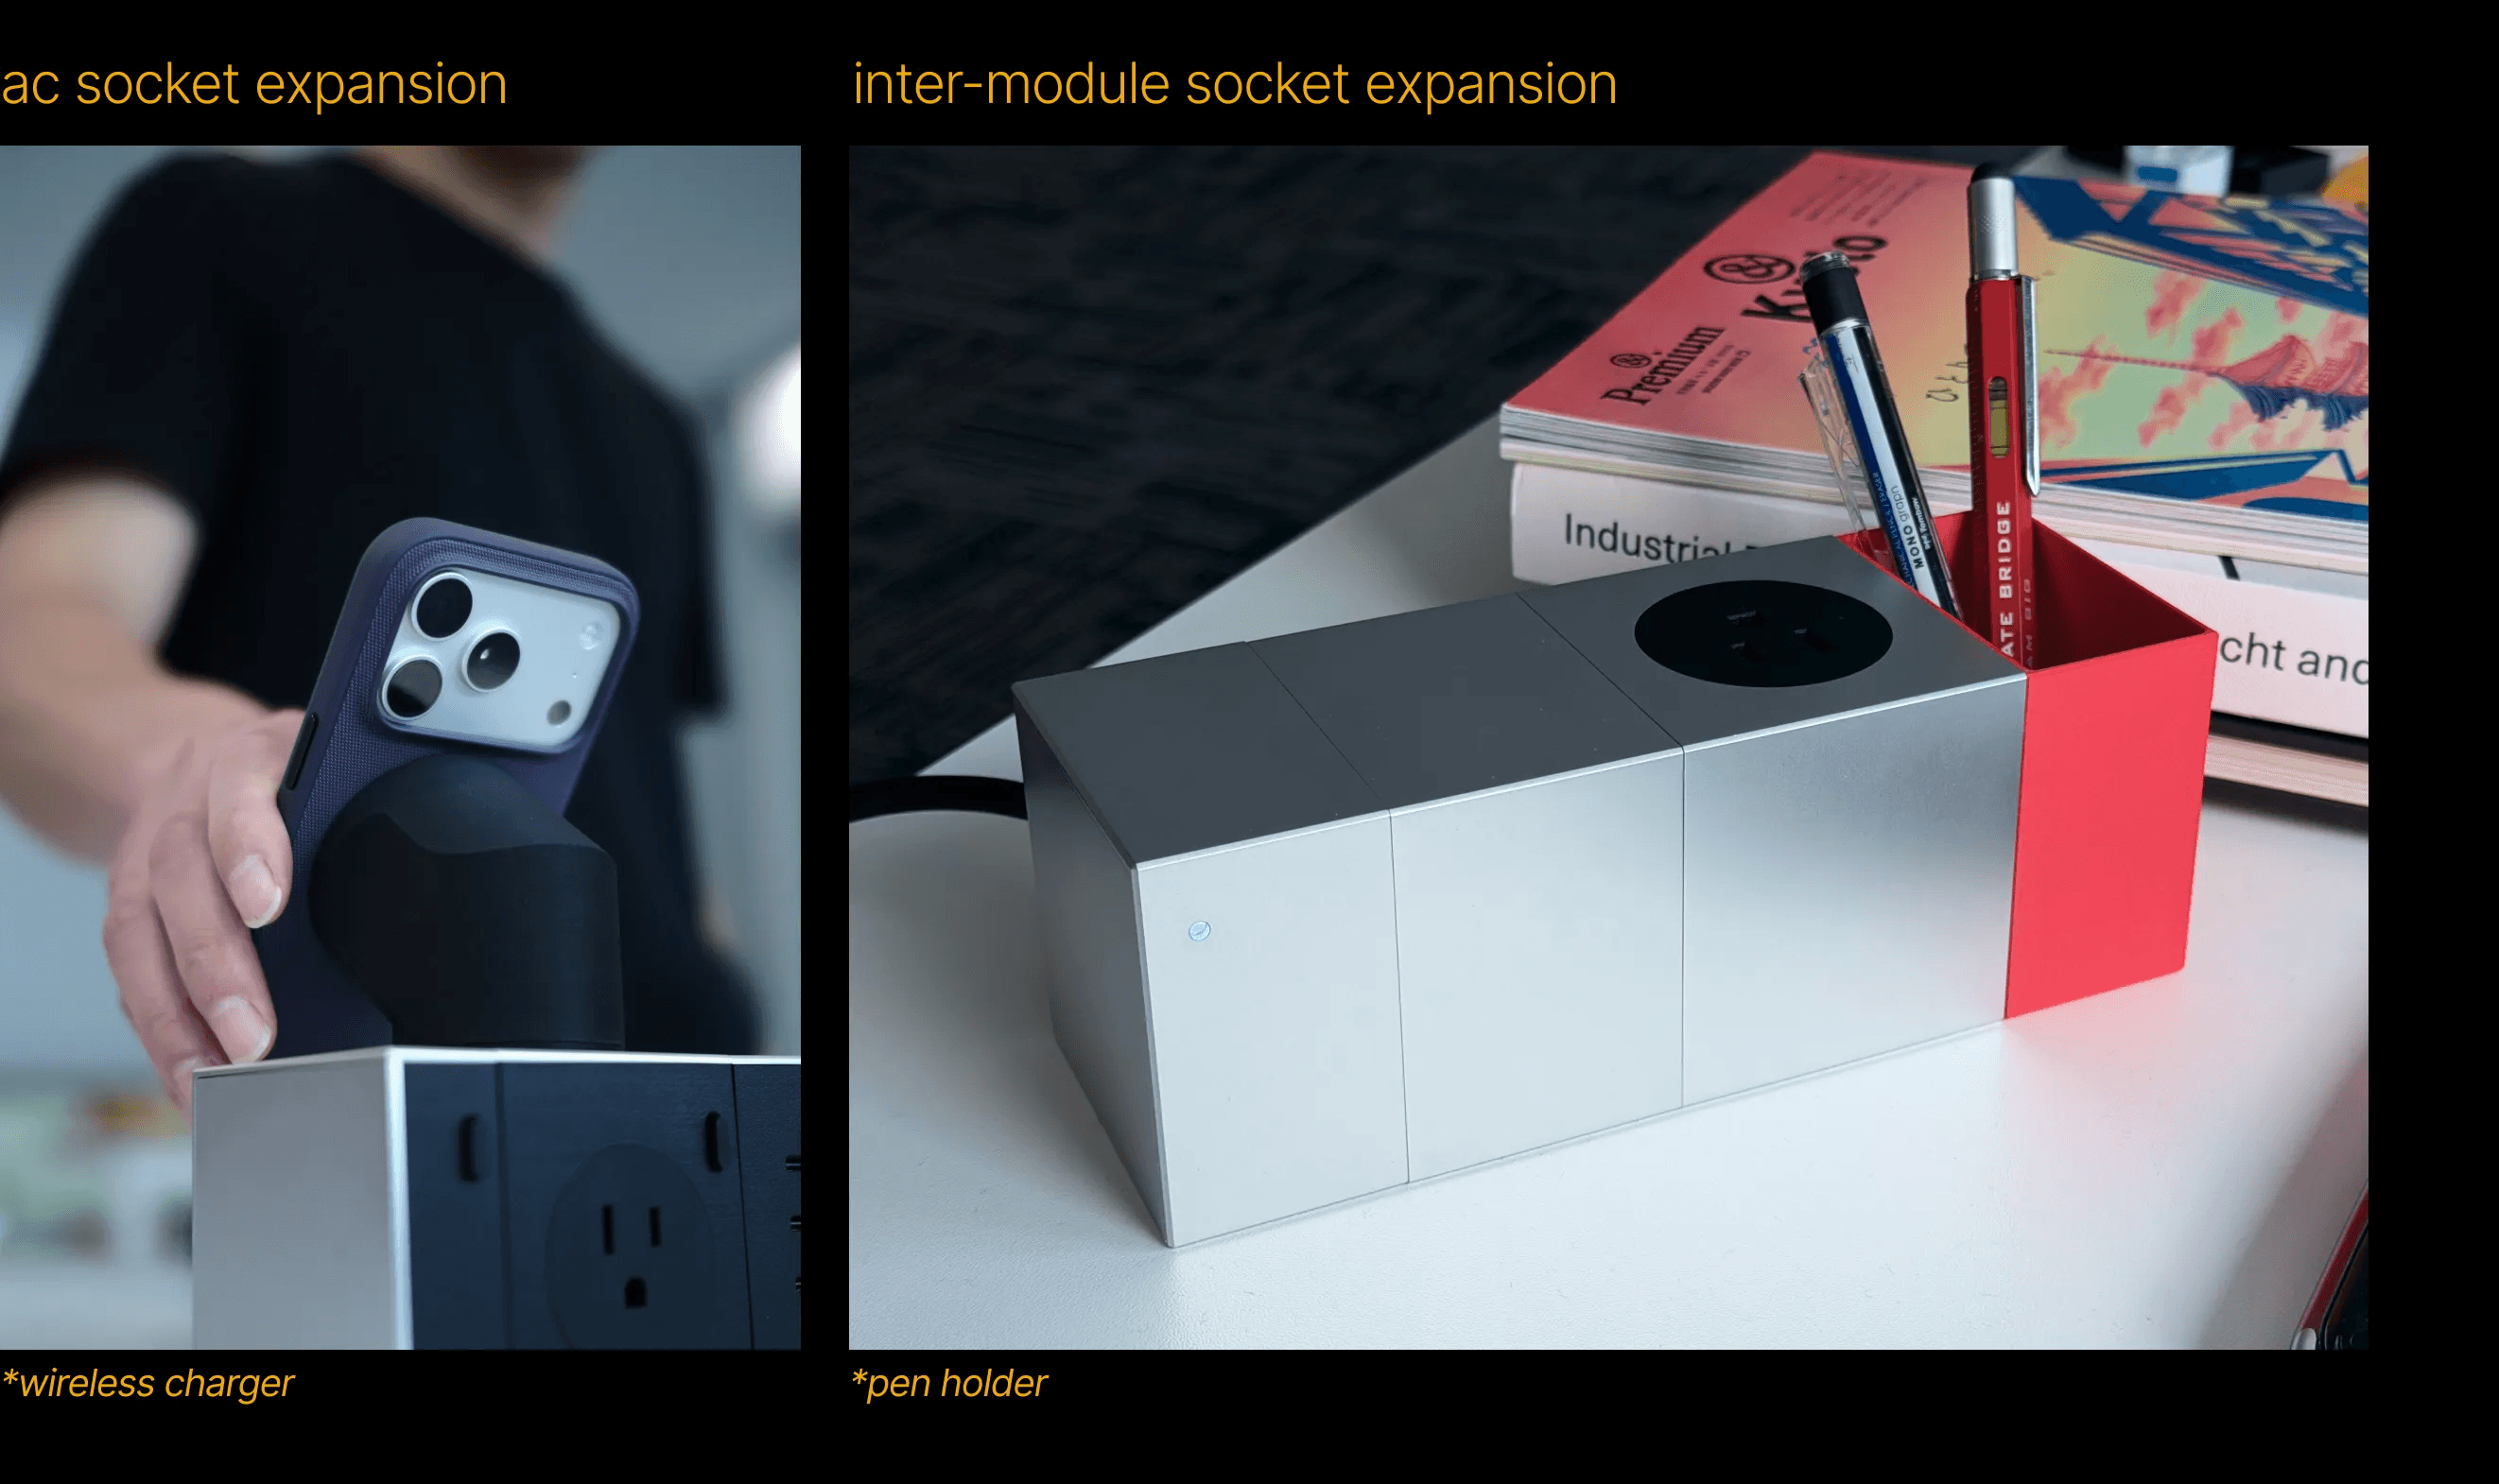
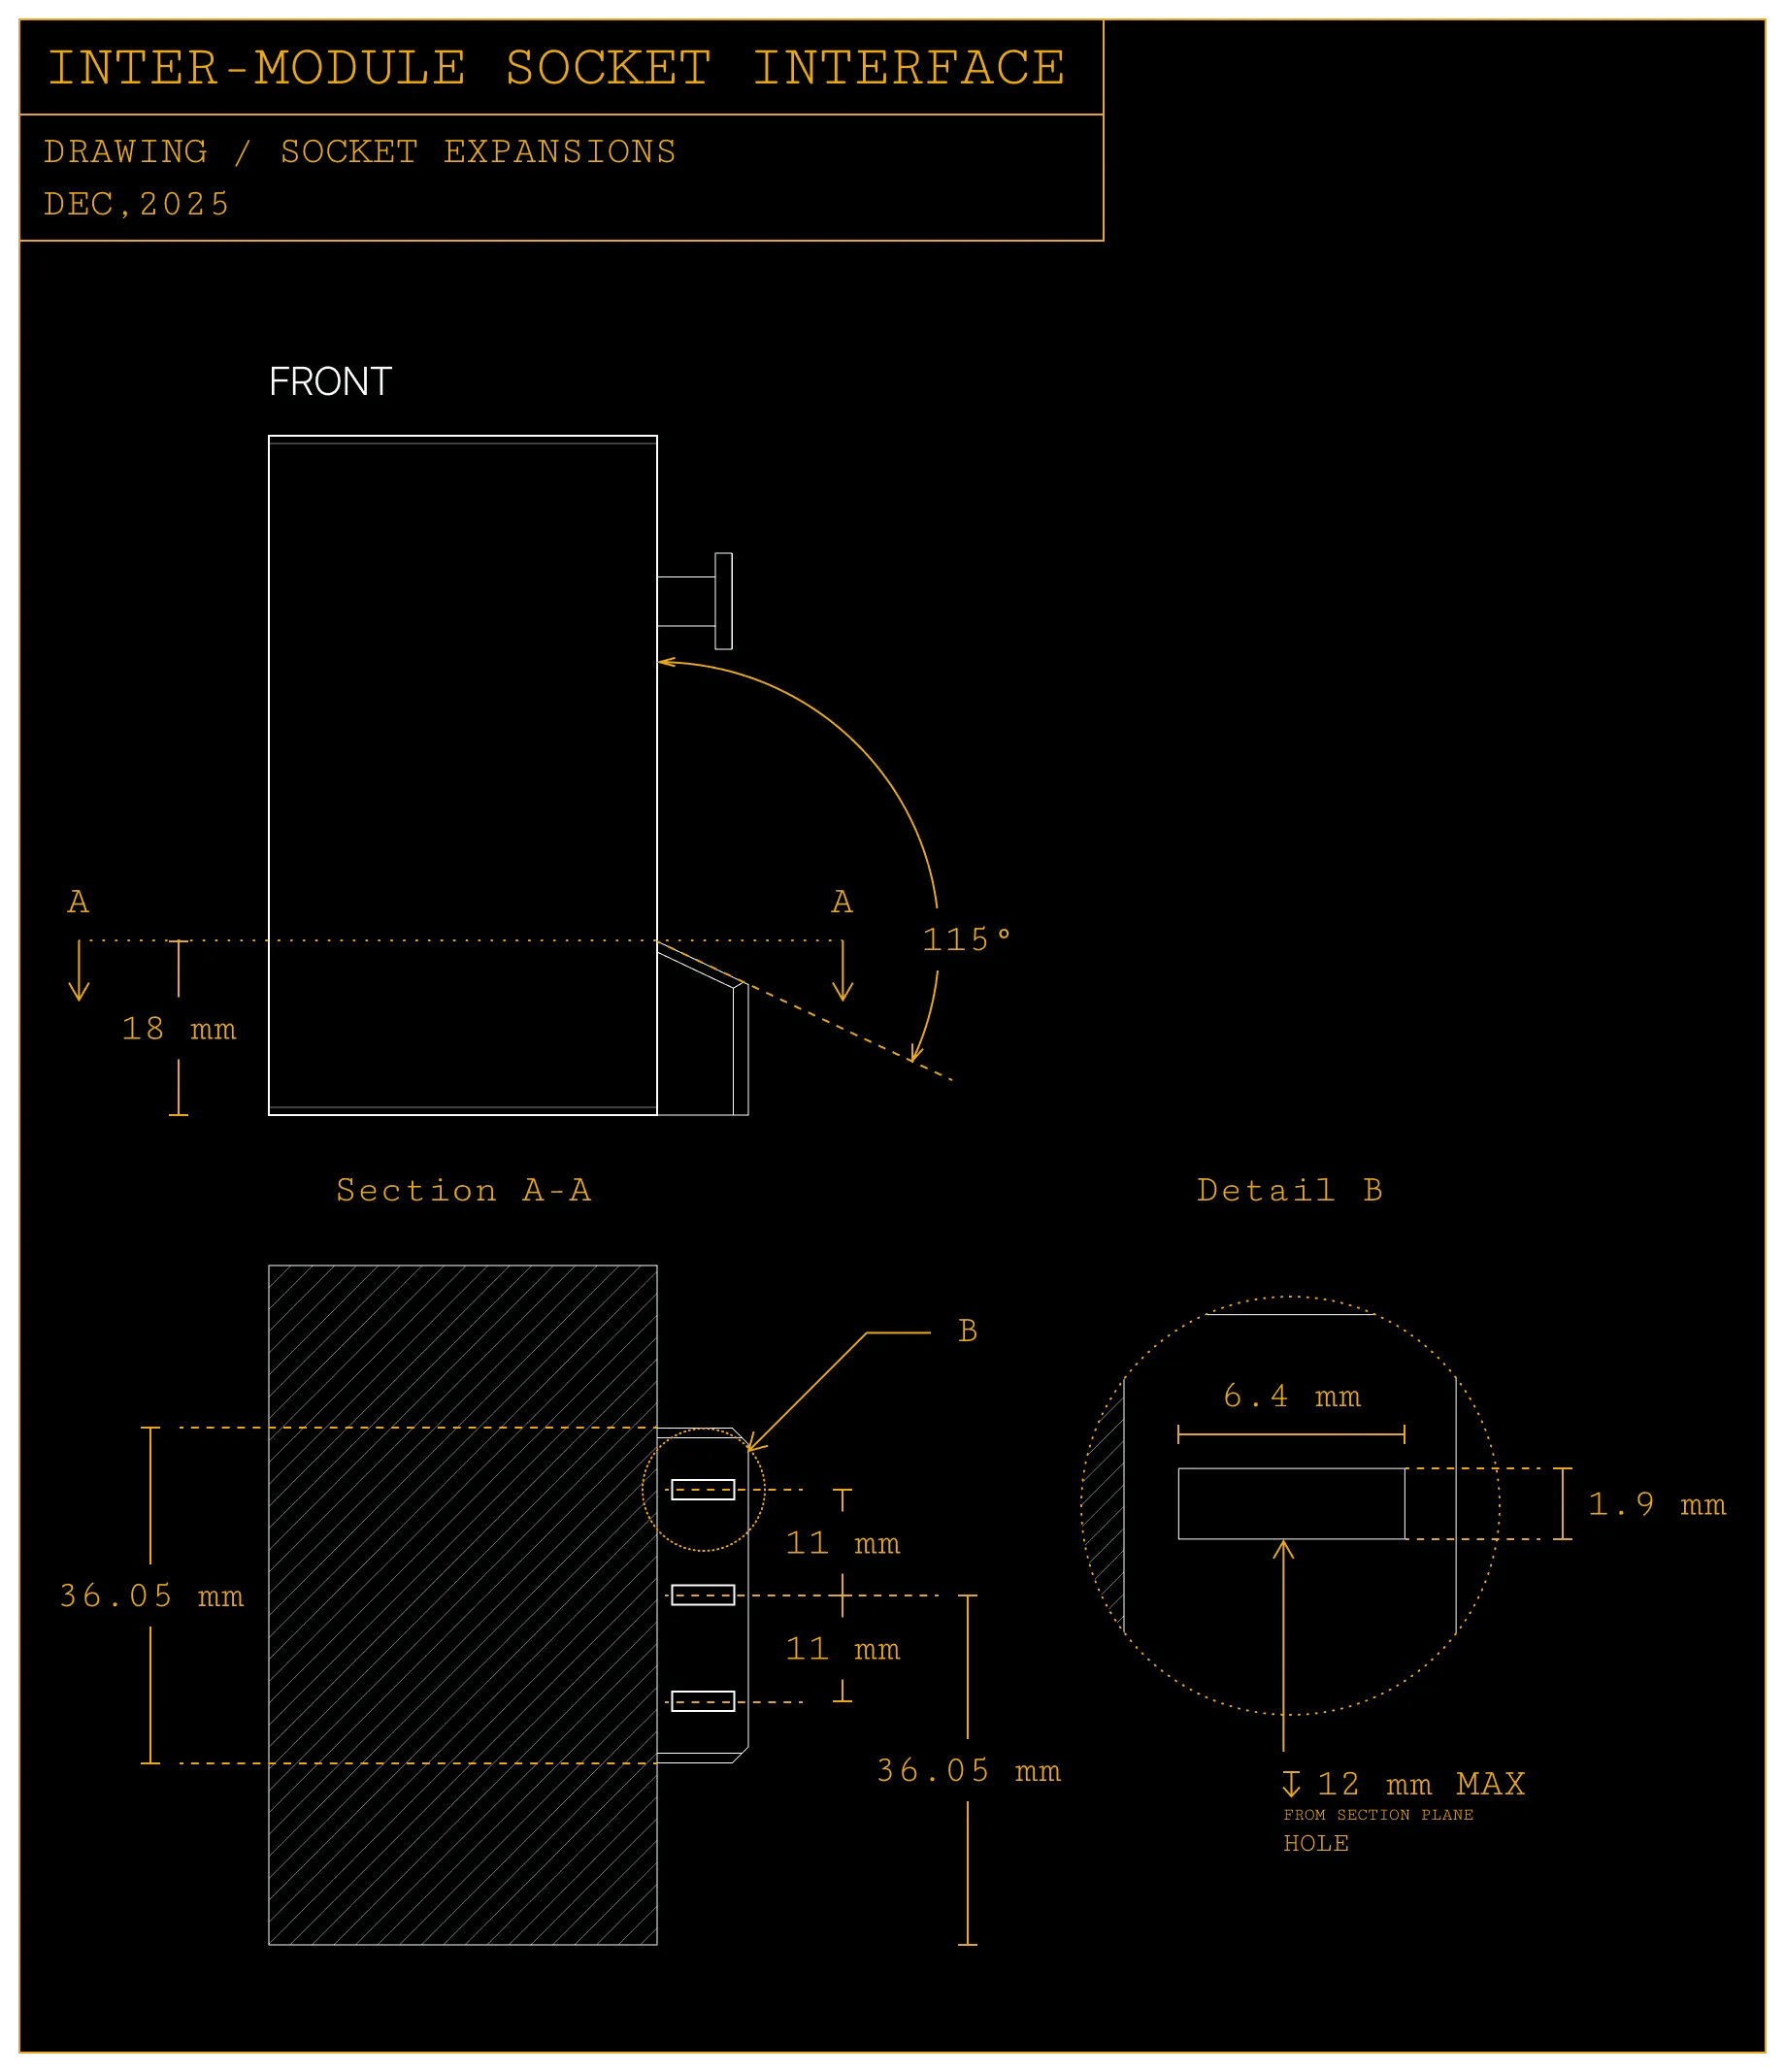
socket expansion
The inter-module socket, as well as the AC sockets on the AC module, can also be used to expand the array’s capabilities.
For reference, we created a magnetic wireless charger that works with the AC socket, and a pen holder that replaces the end to add extra storage to your desktop.
Use the dimension guide below when creating compatible accessories.
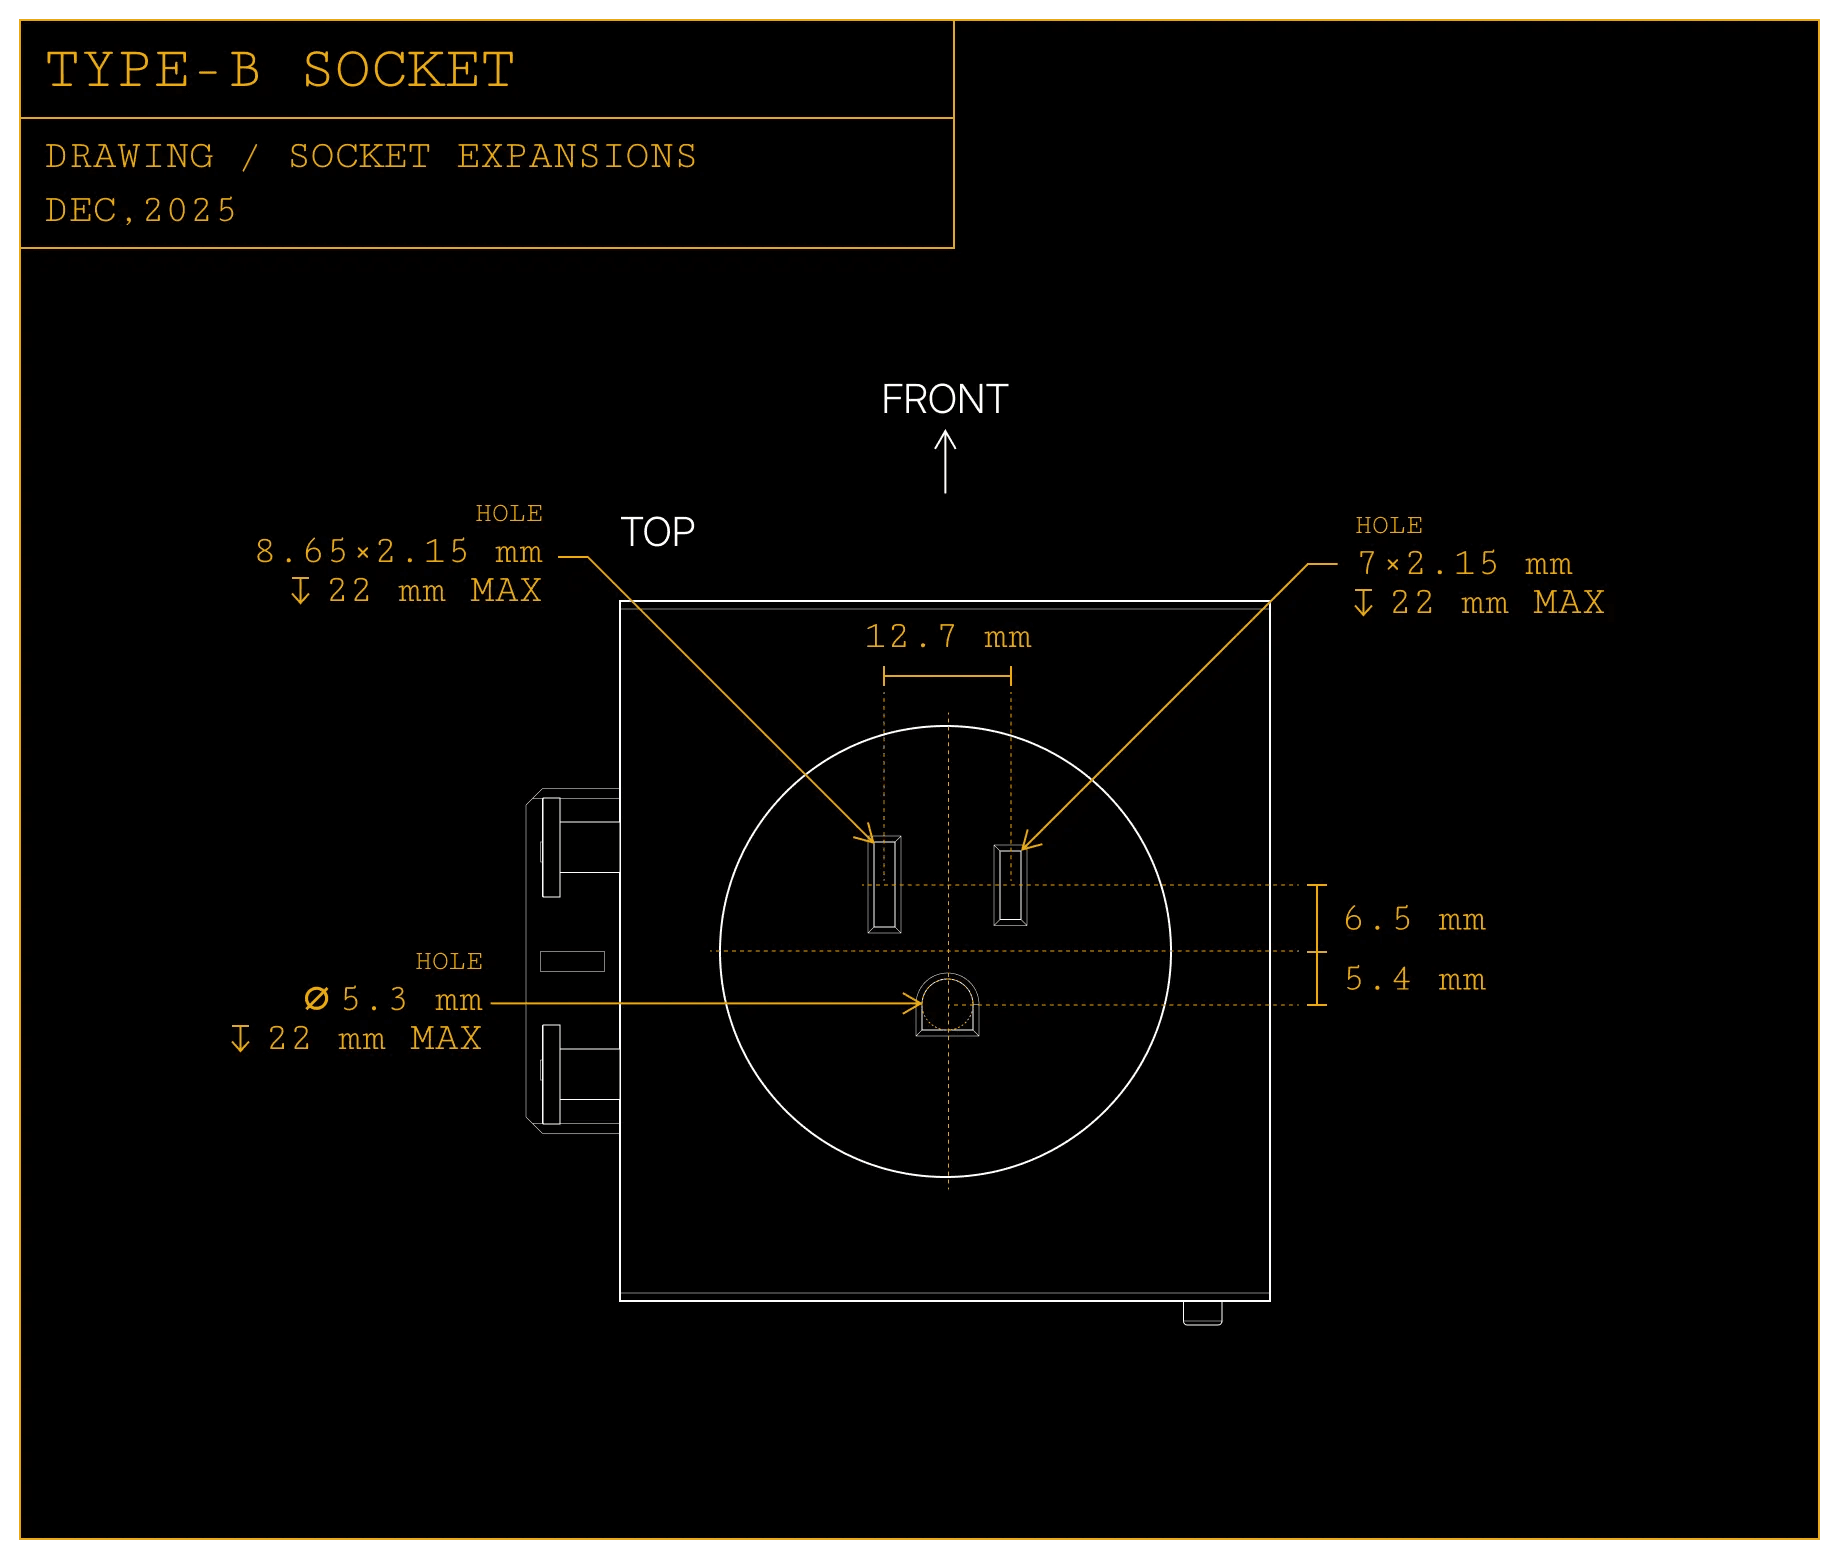
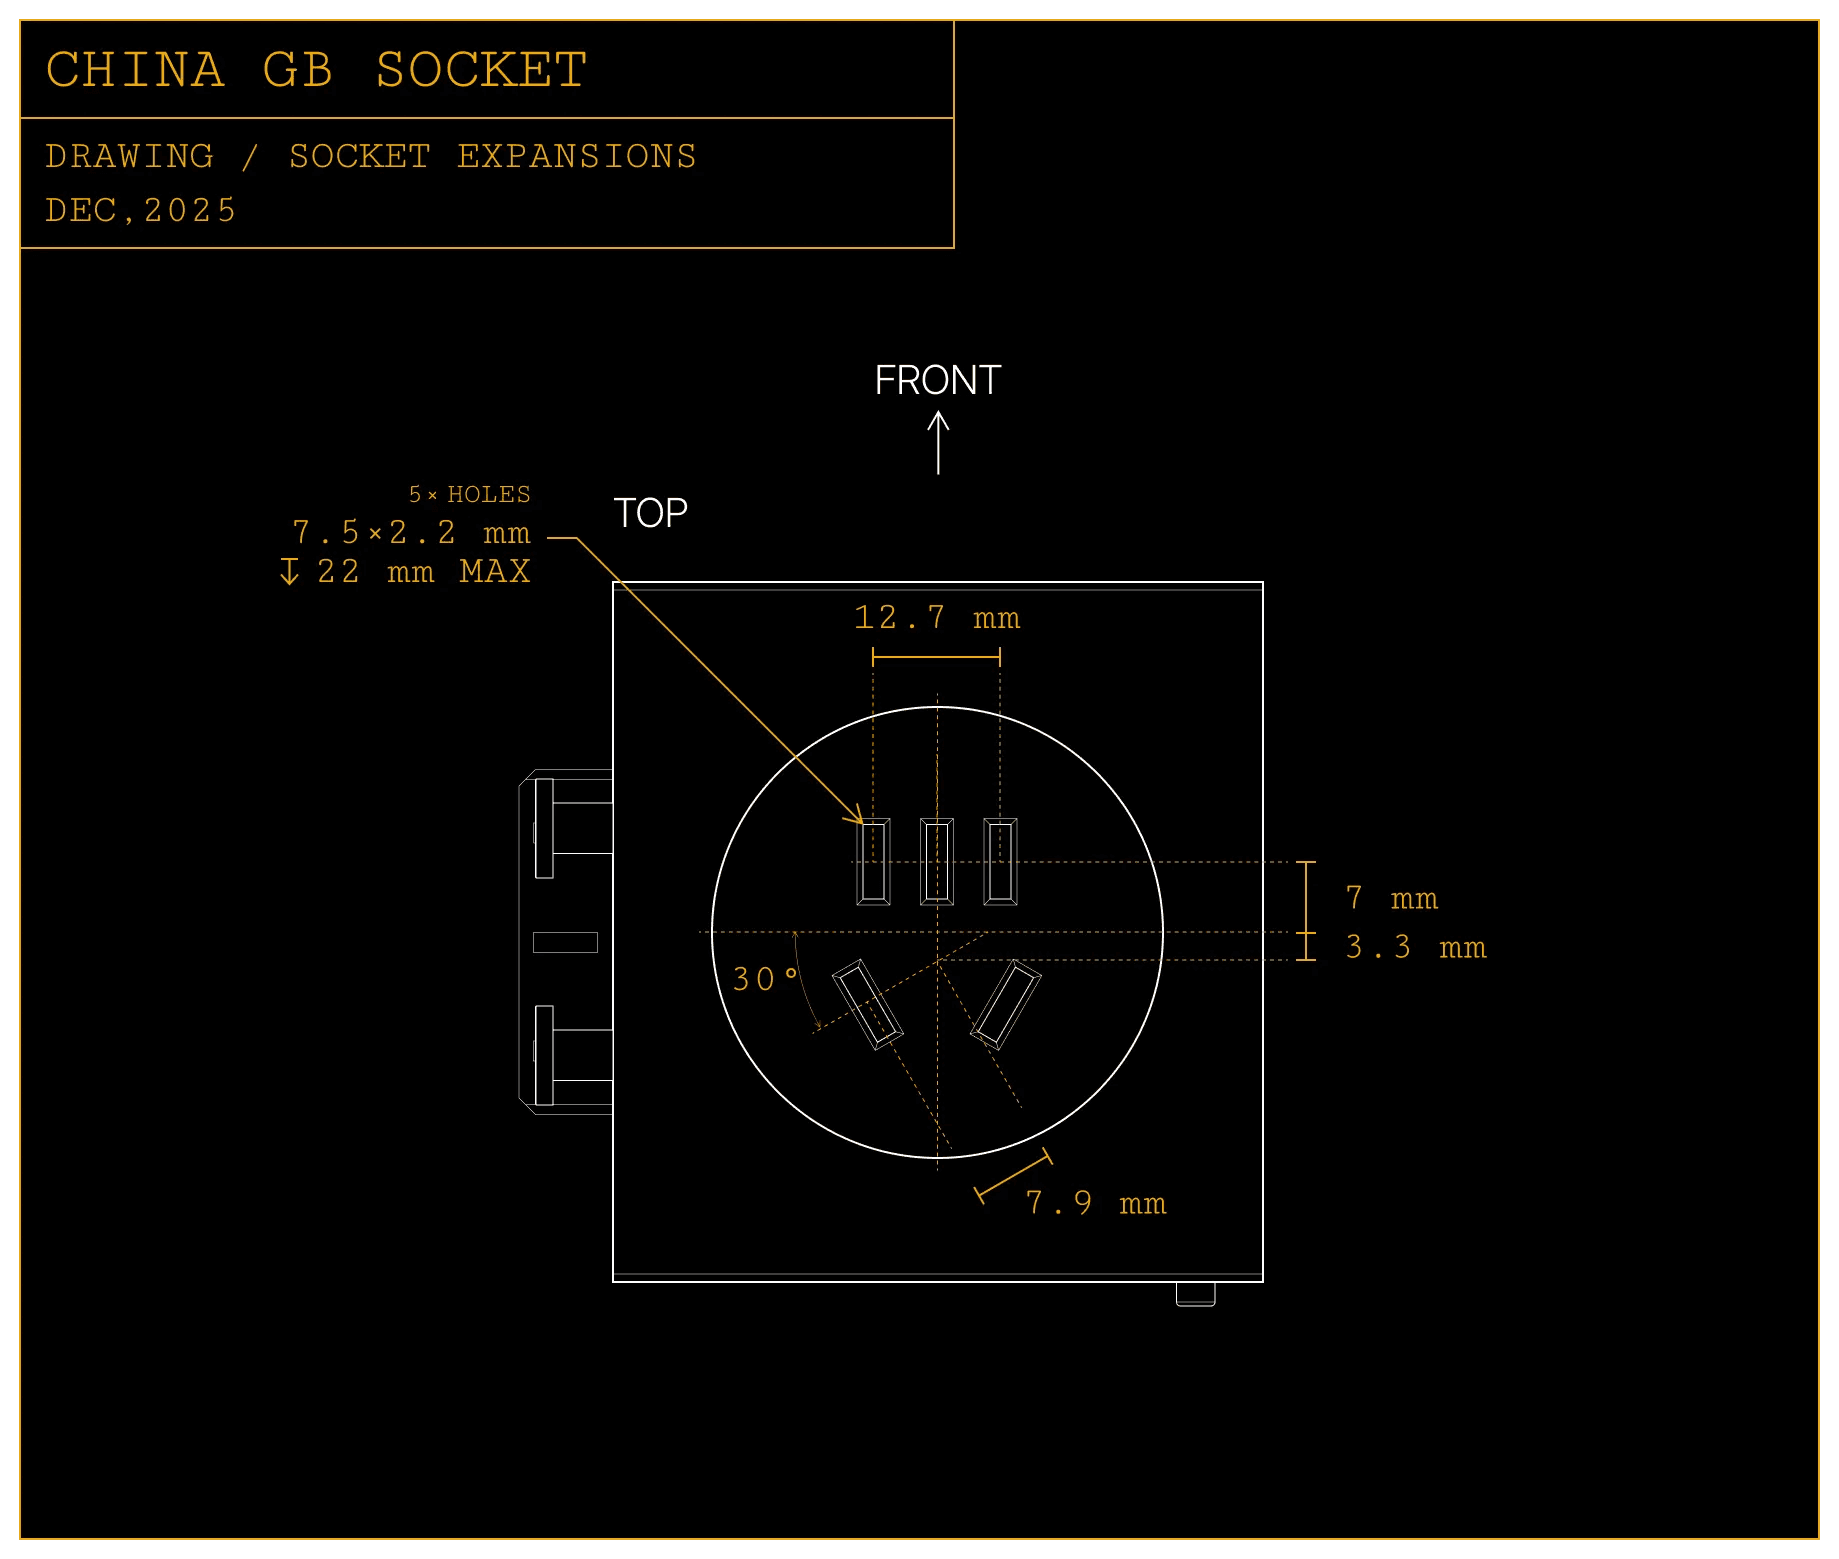
Currently we only provide two versions of AC module: Type-B socket version and China GB socket version.
Please refer to Can I use AC module in my region? before choosing AC module.
maintenance & safety
The inter-module sockets or AC sockets carry high voltage when powered. Please ensure all your designs include proper insulation and safety protection before use.
Keep conductive or metal items away from sockets when powered.
Clean surfaces with a soft cloth when they gets dirty.
Always disconnect power before assembling, removing, or reconfiguring modules.
make it yours
Customize the array in a way that fits your workflow.
Combine modules, attach magnetic tools, or design your own accessories.
Have fun exploring the endless possibilities of the array.
tap into flow.
© 2025 Flow Tangible Limited.
All Rights Reserved.


